
Do you have a new terminal and need help setting it up? Read on.👇
How to set up terminal step-by-step (iiyama example)
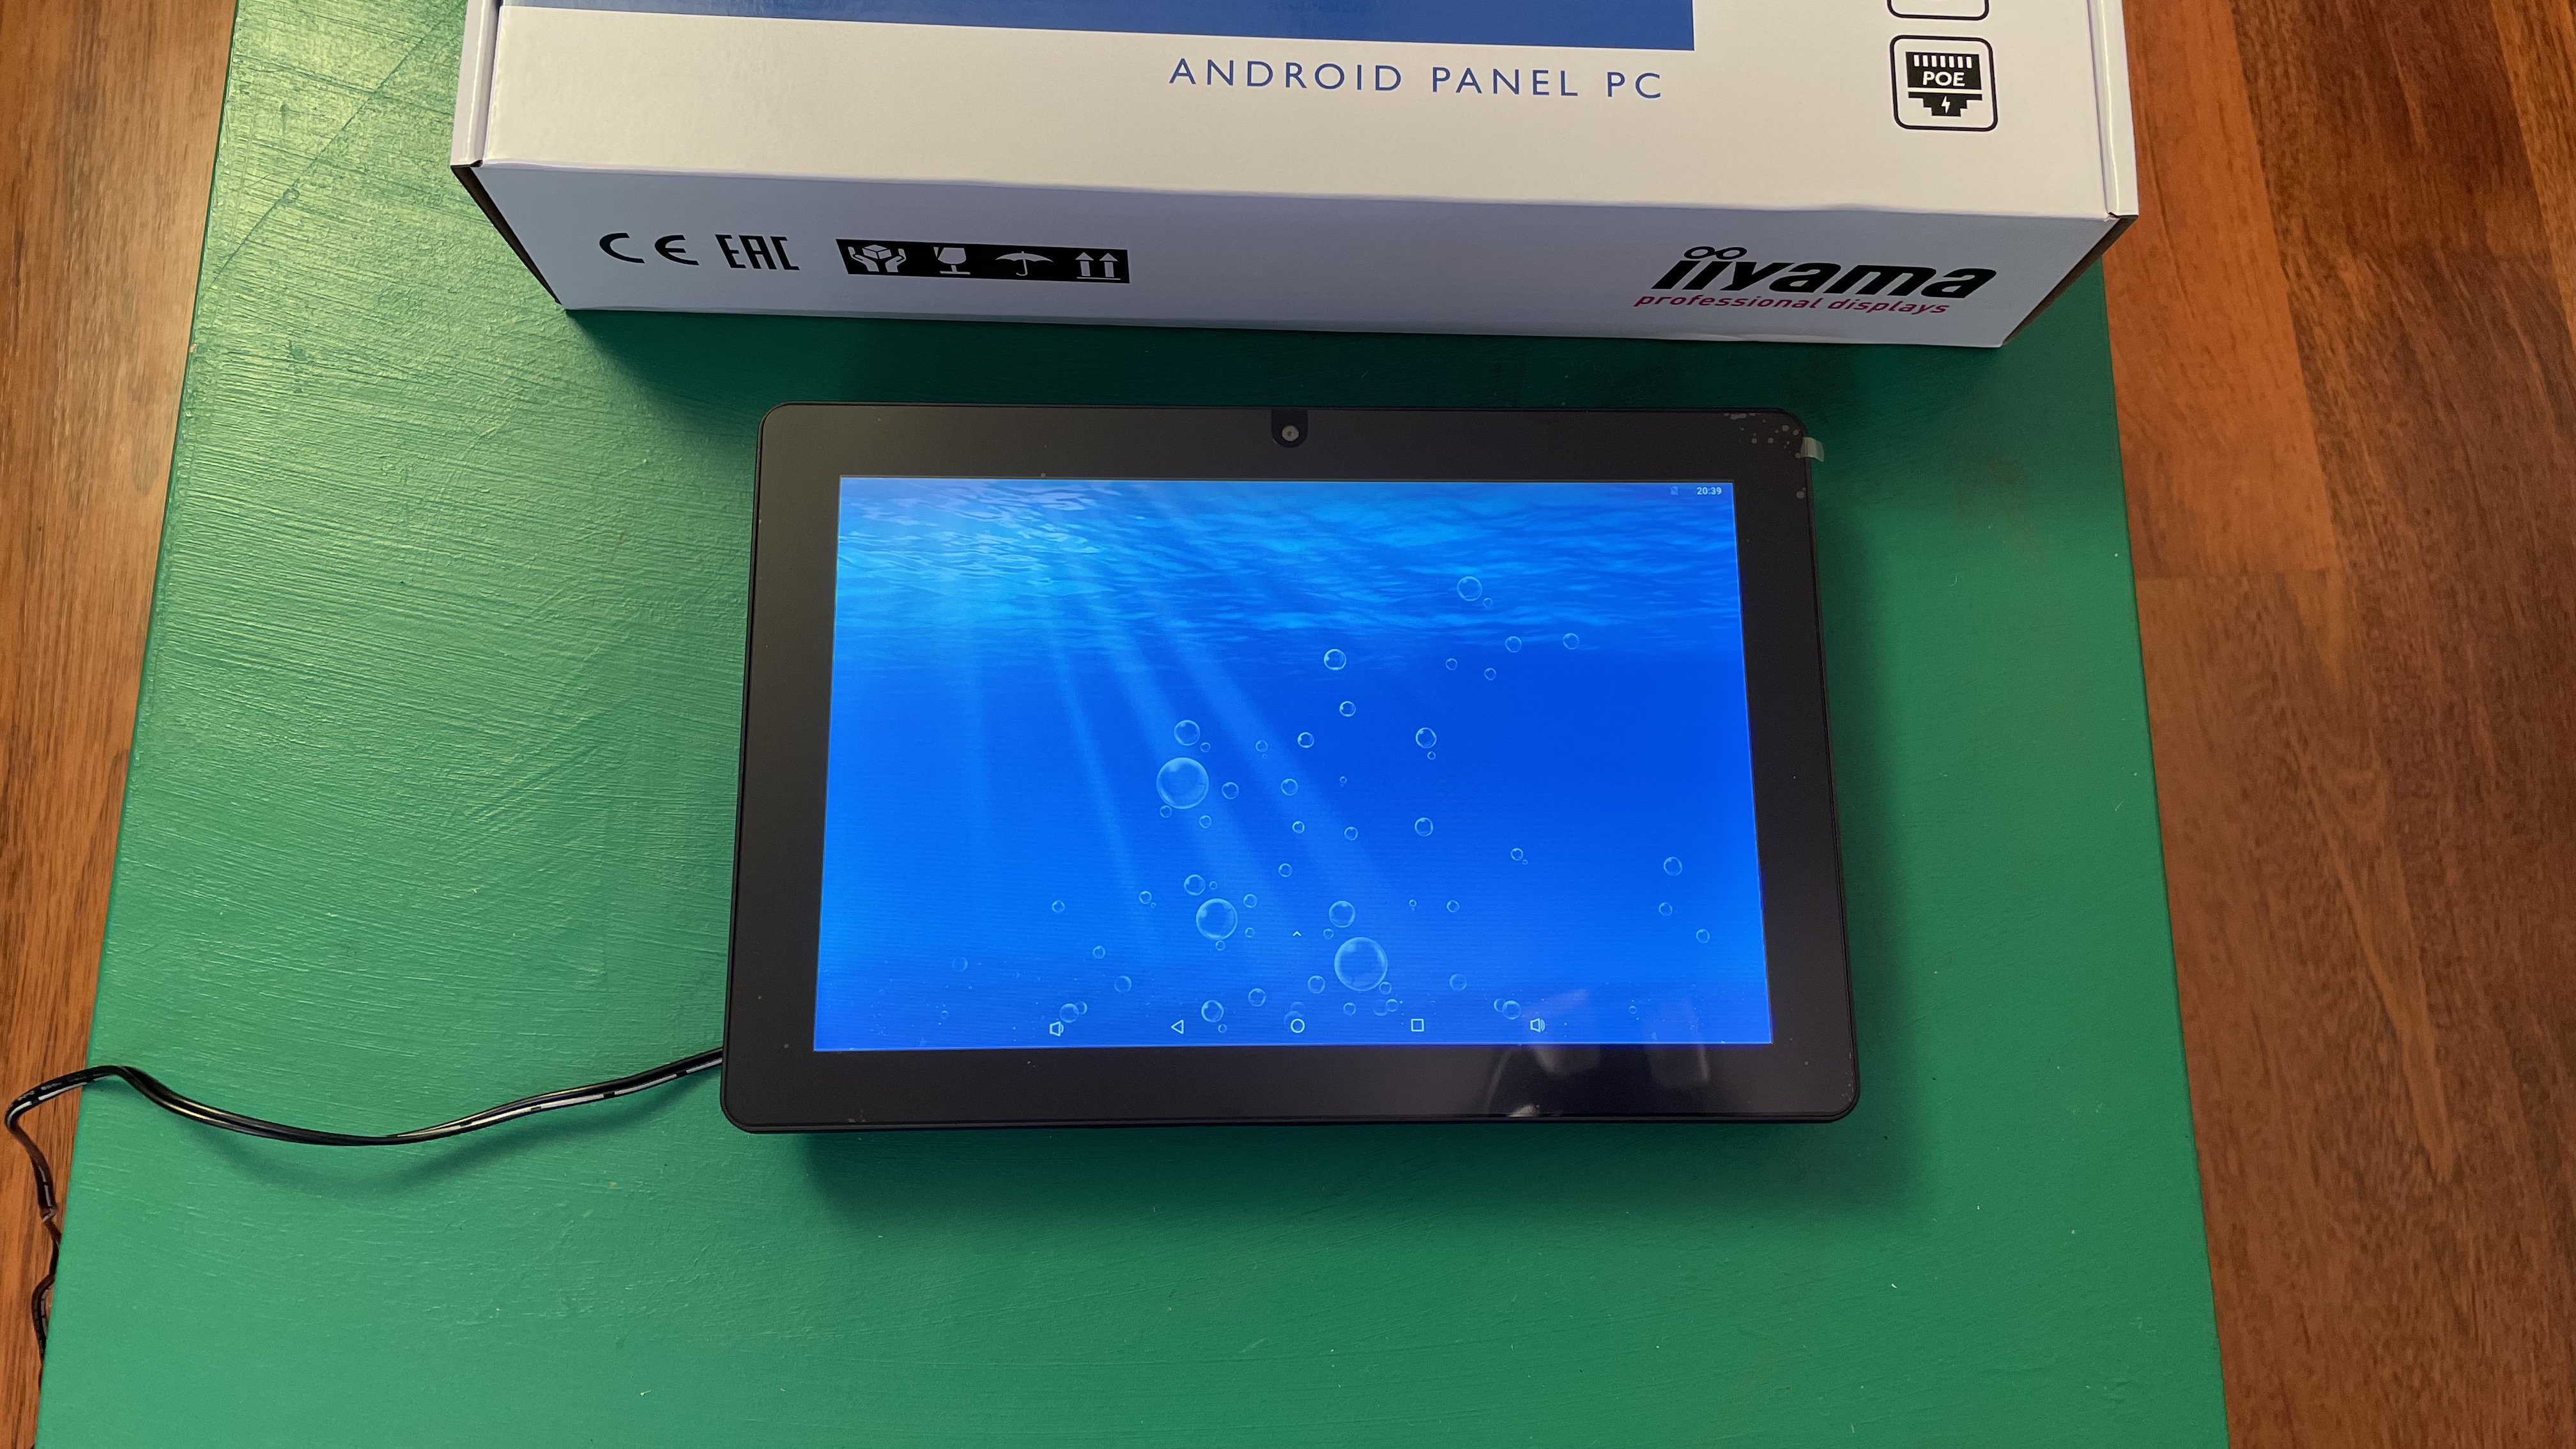
The appearance of the terminal after it is switched on:
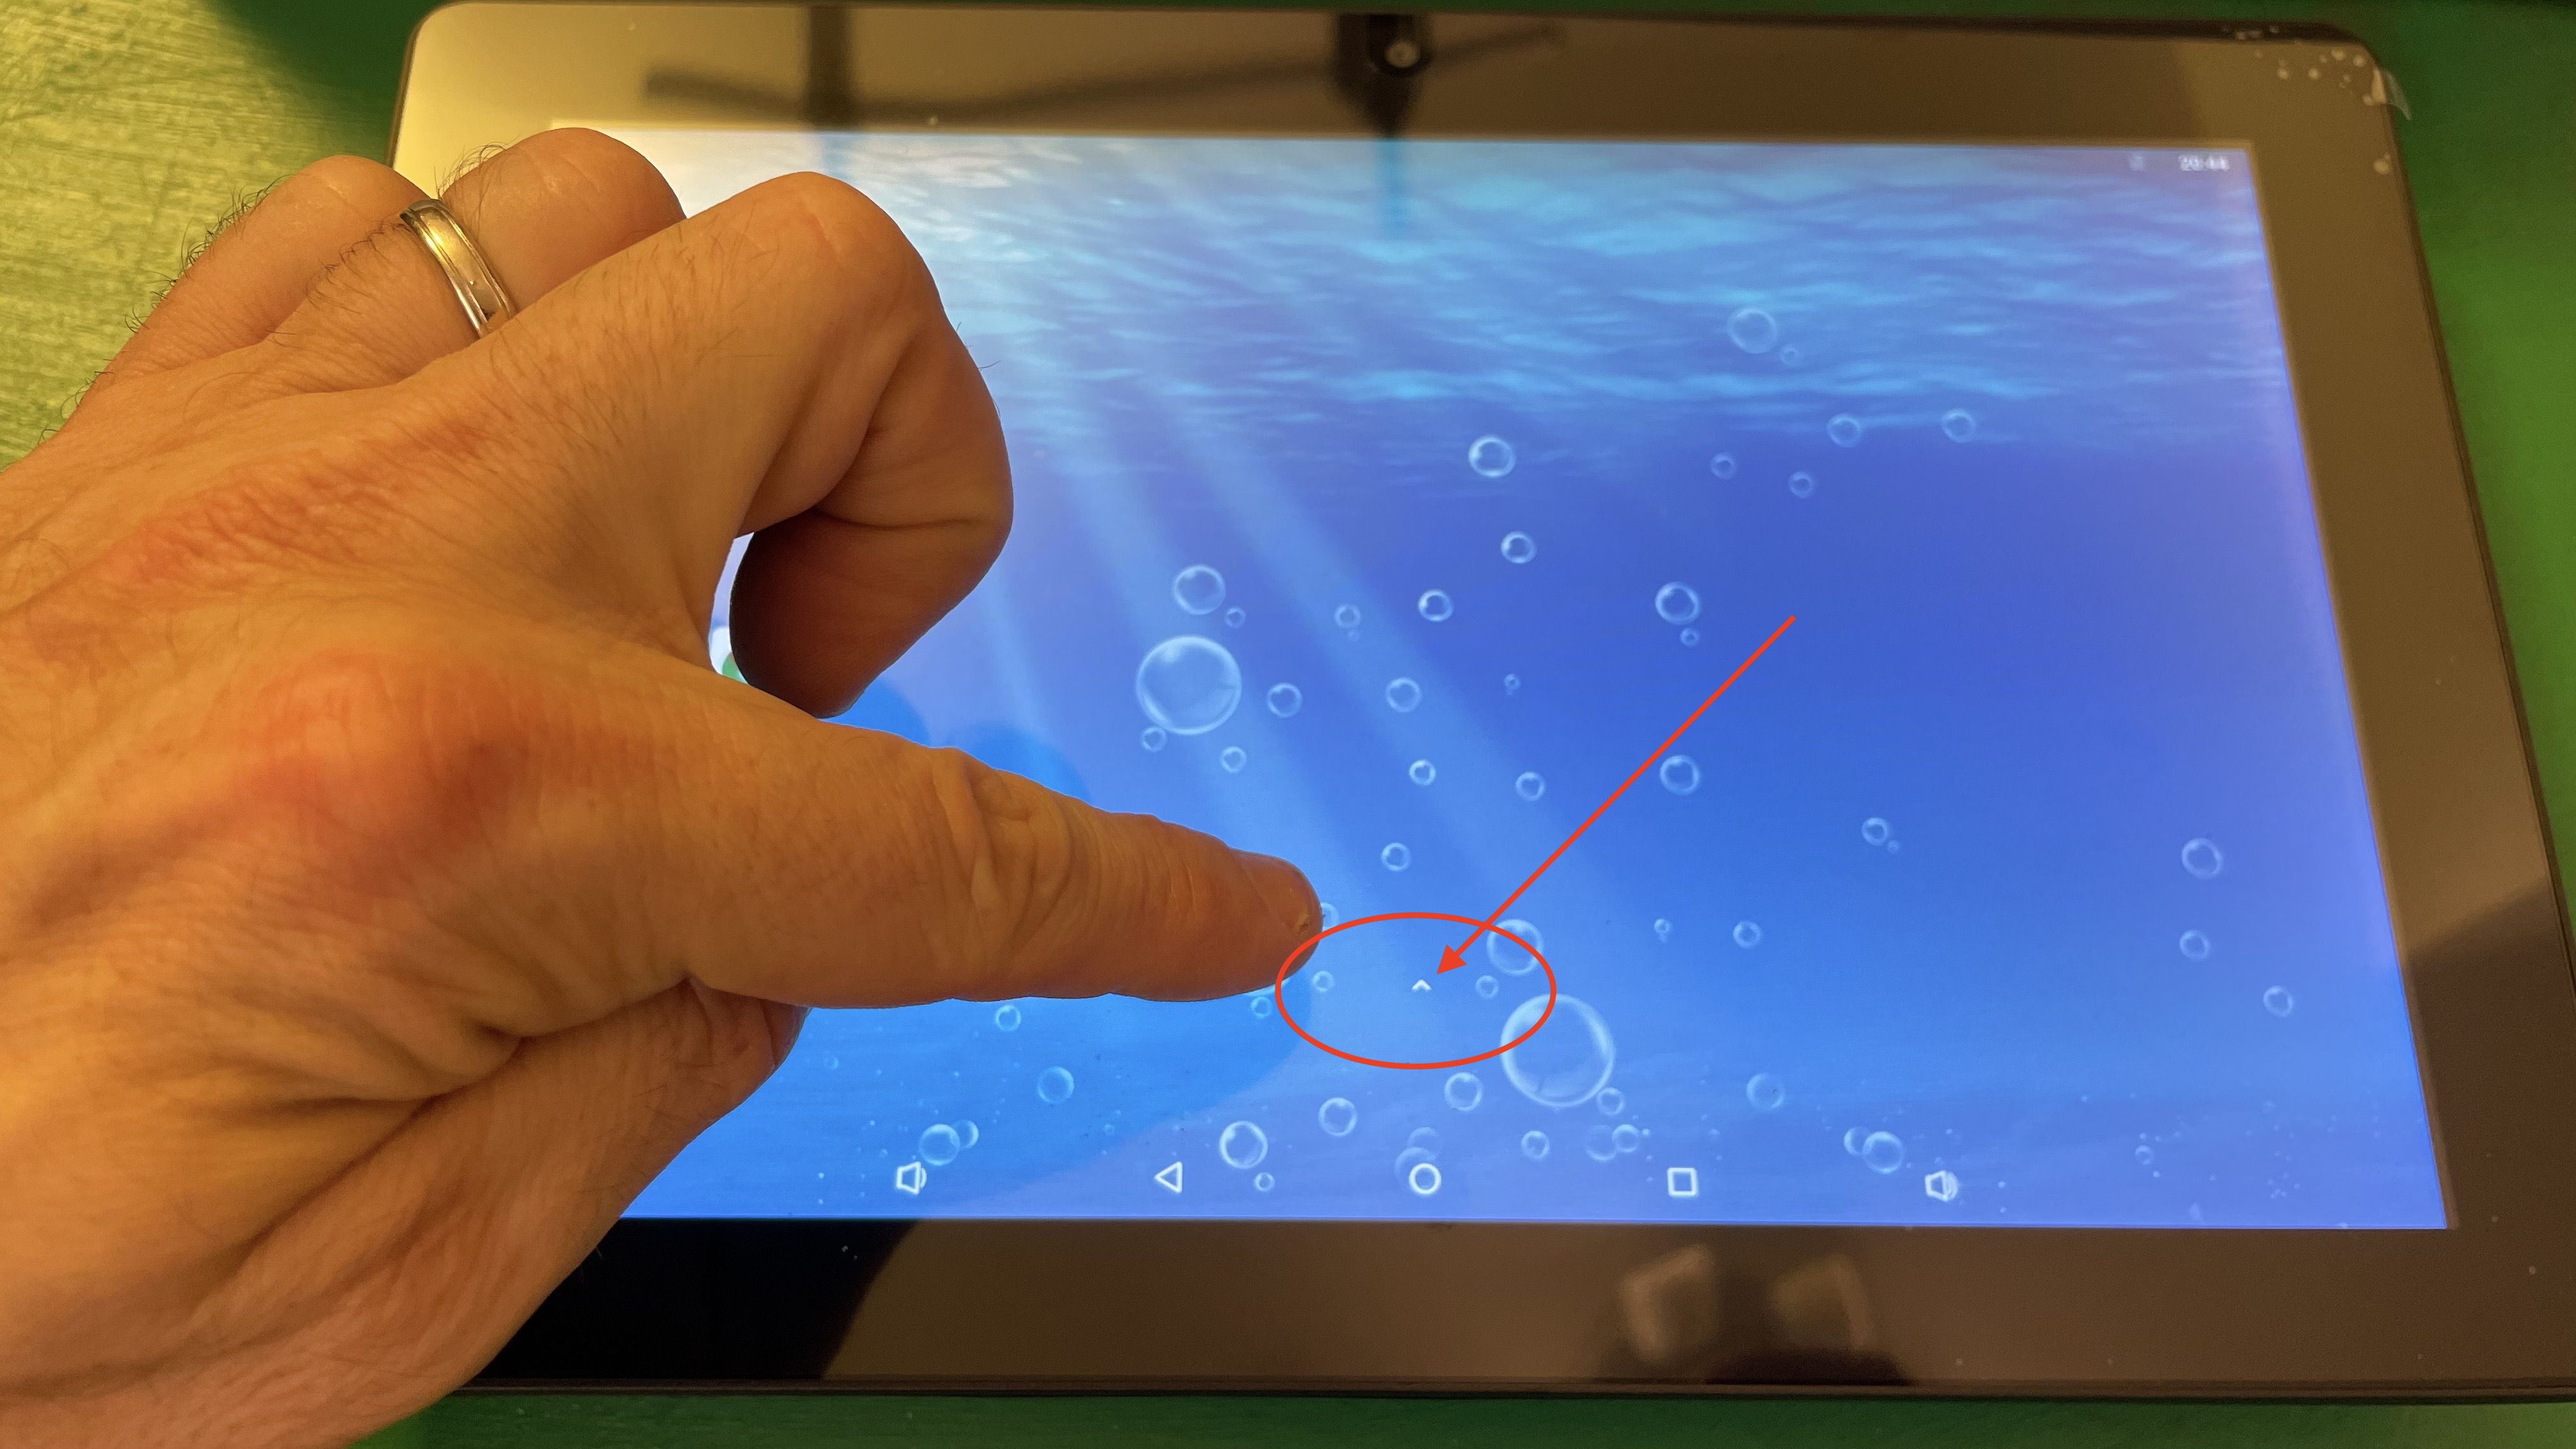
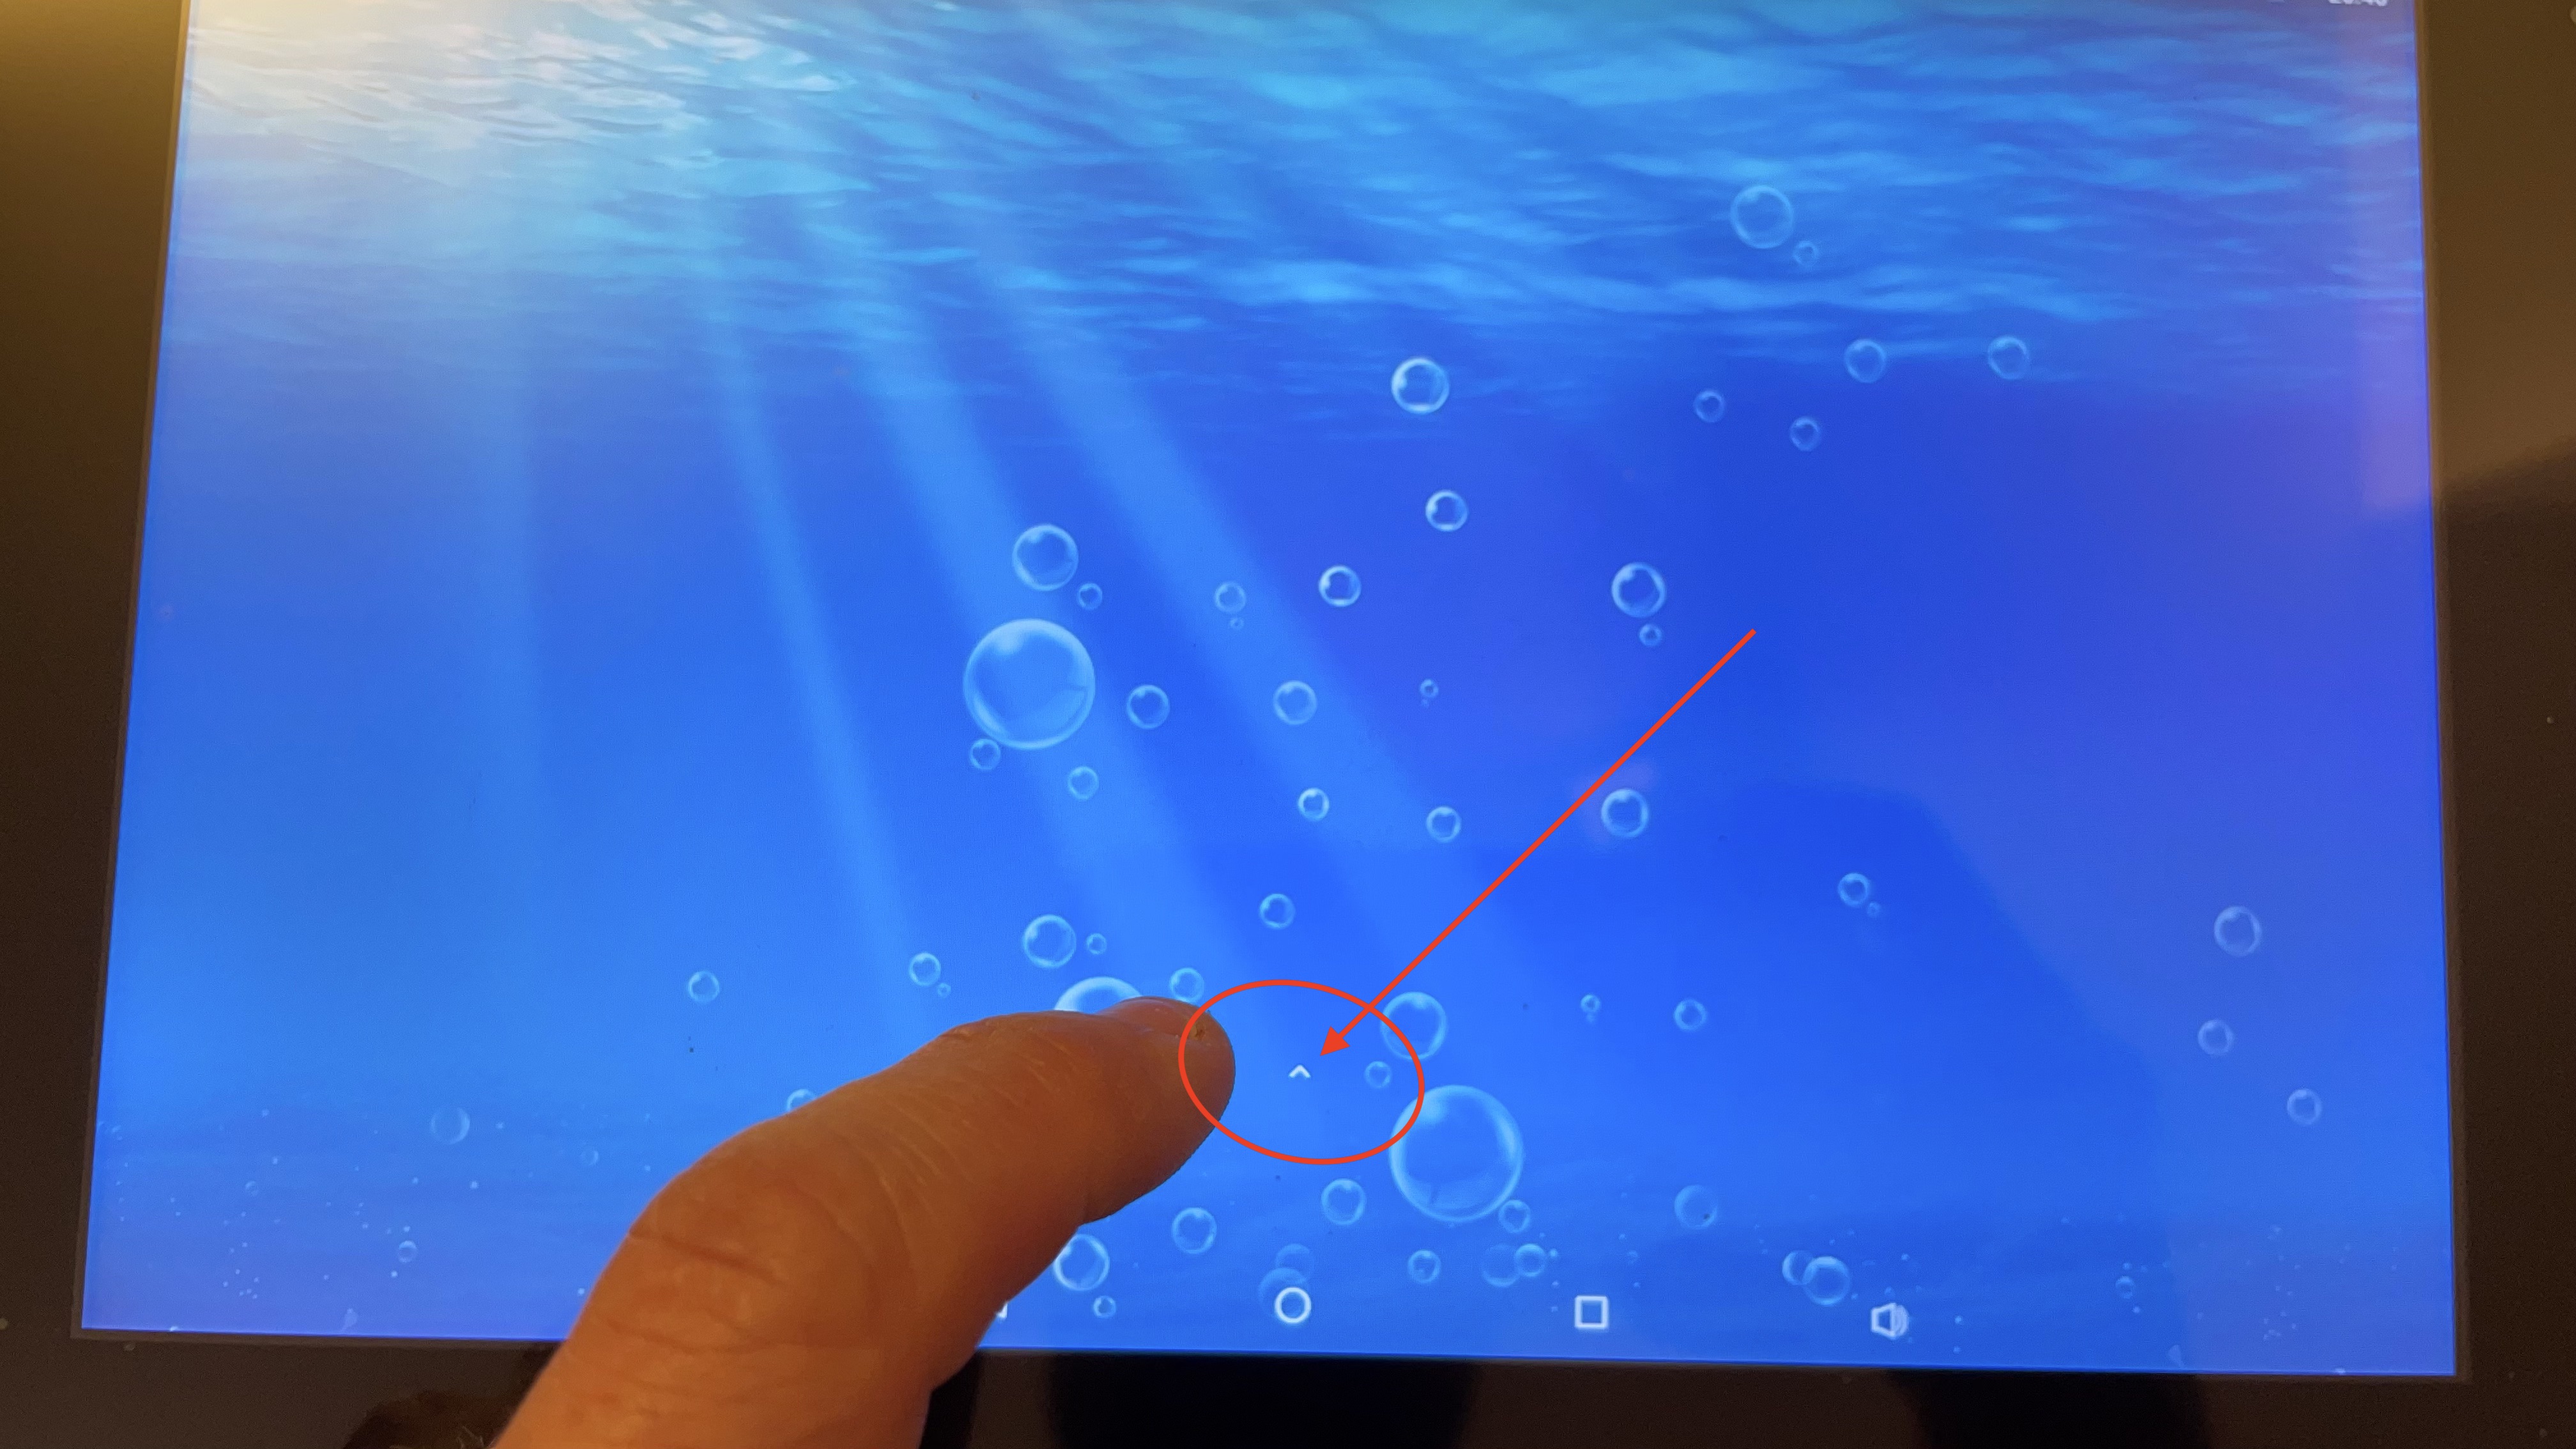
Click on the small arrow to access the menu:
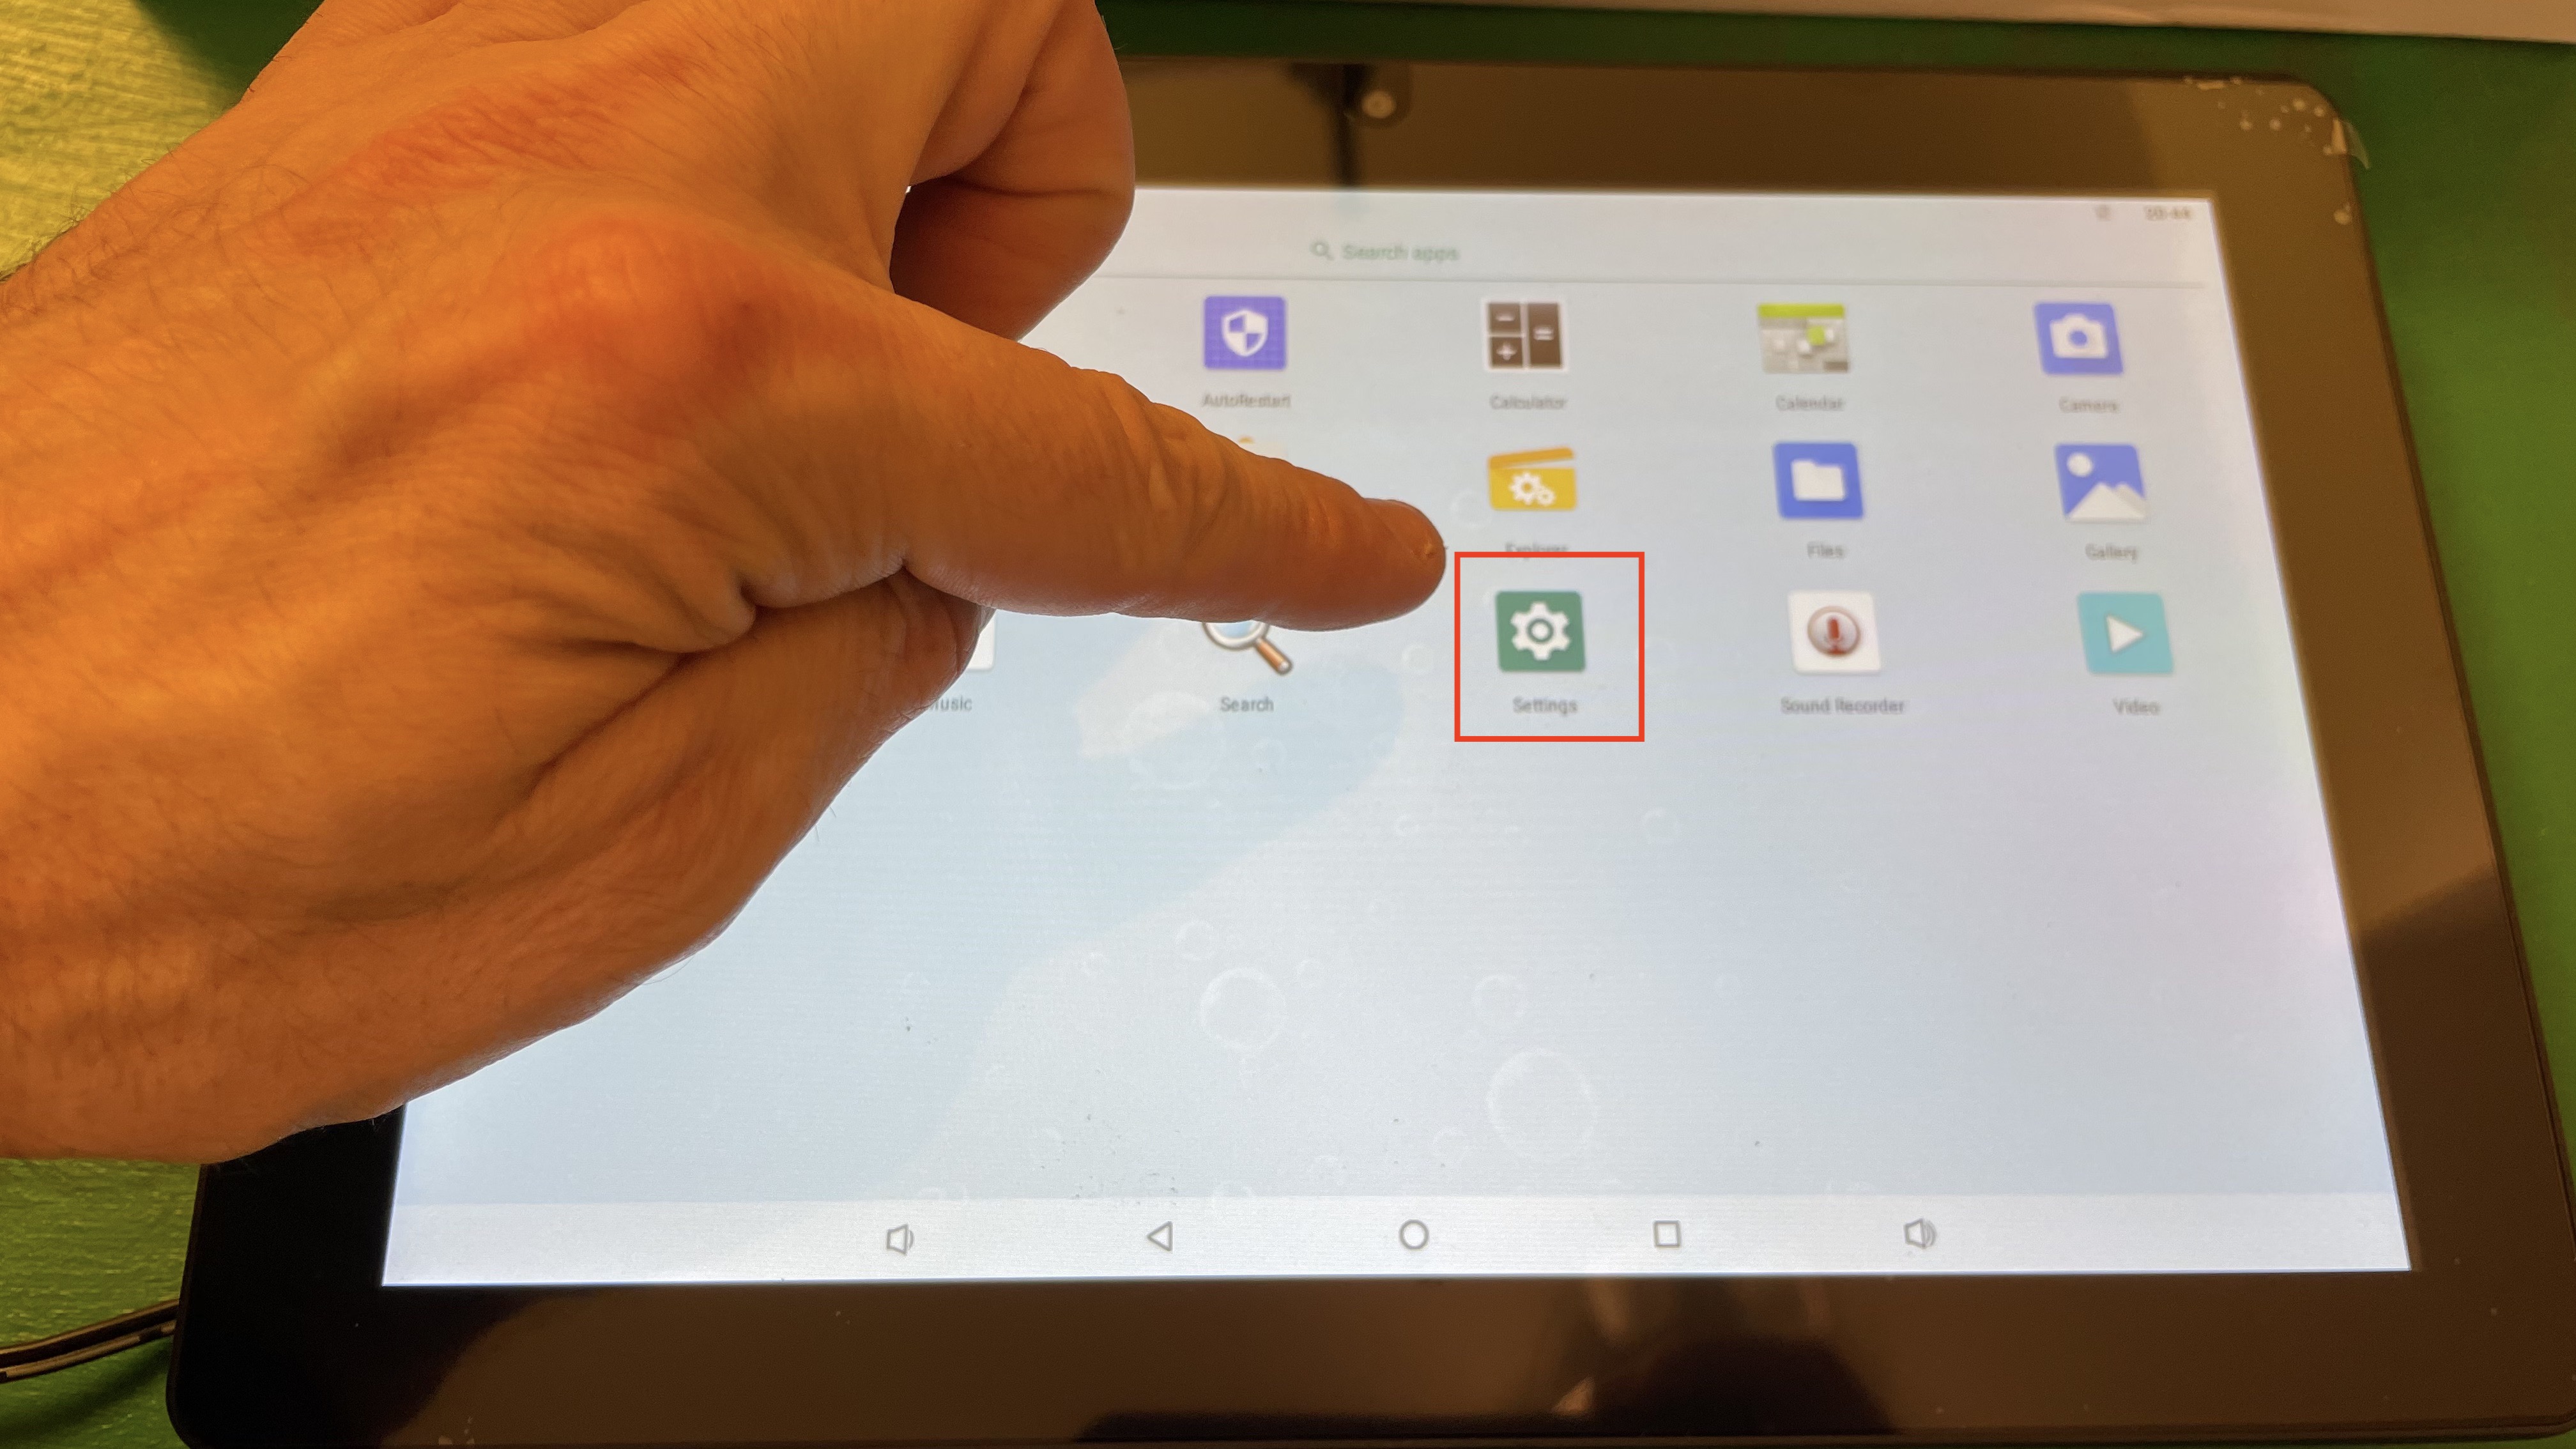
Let's go to the settings:
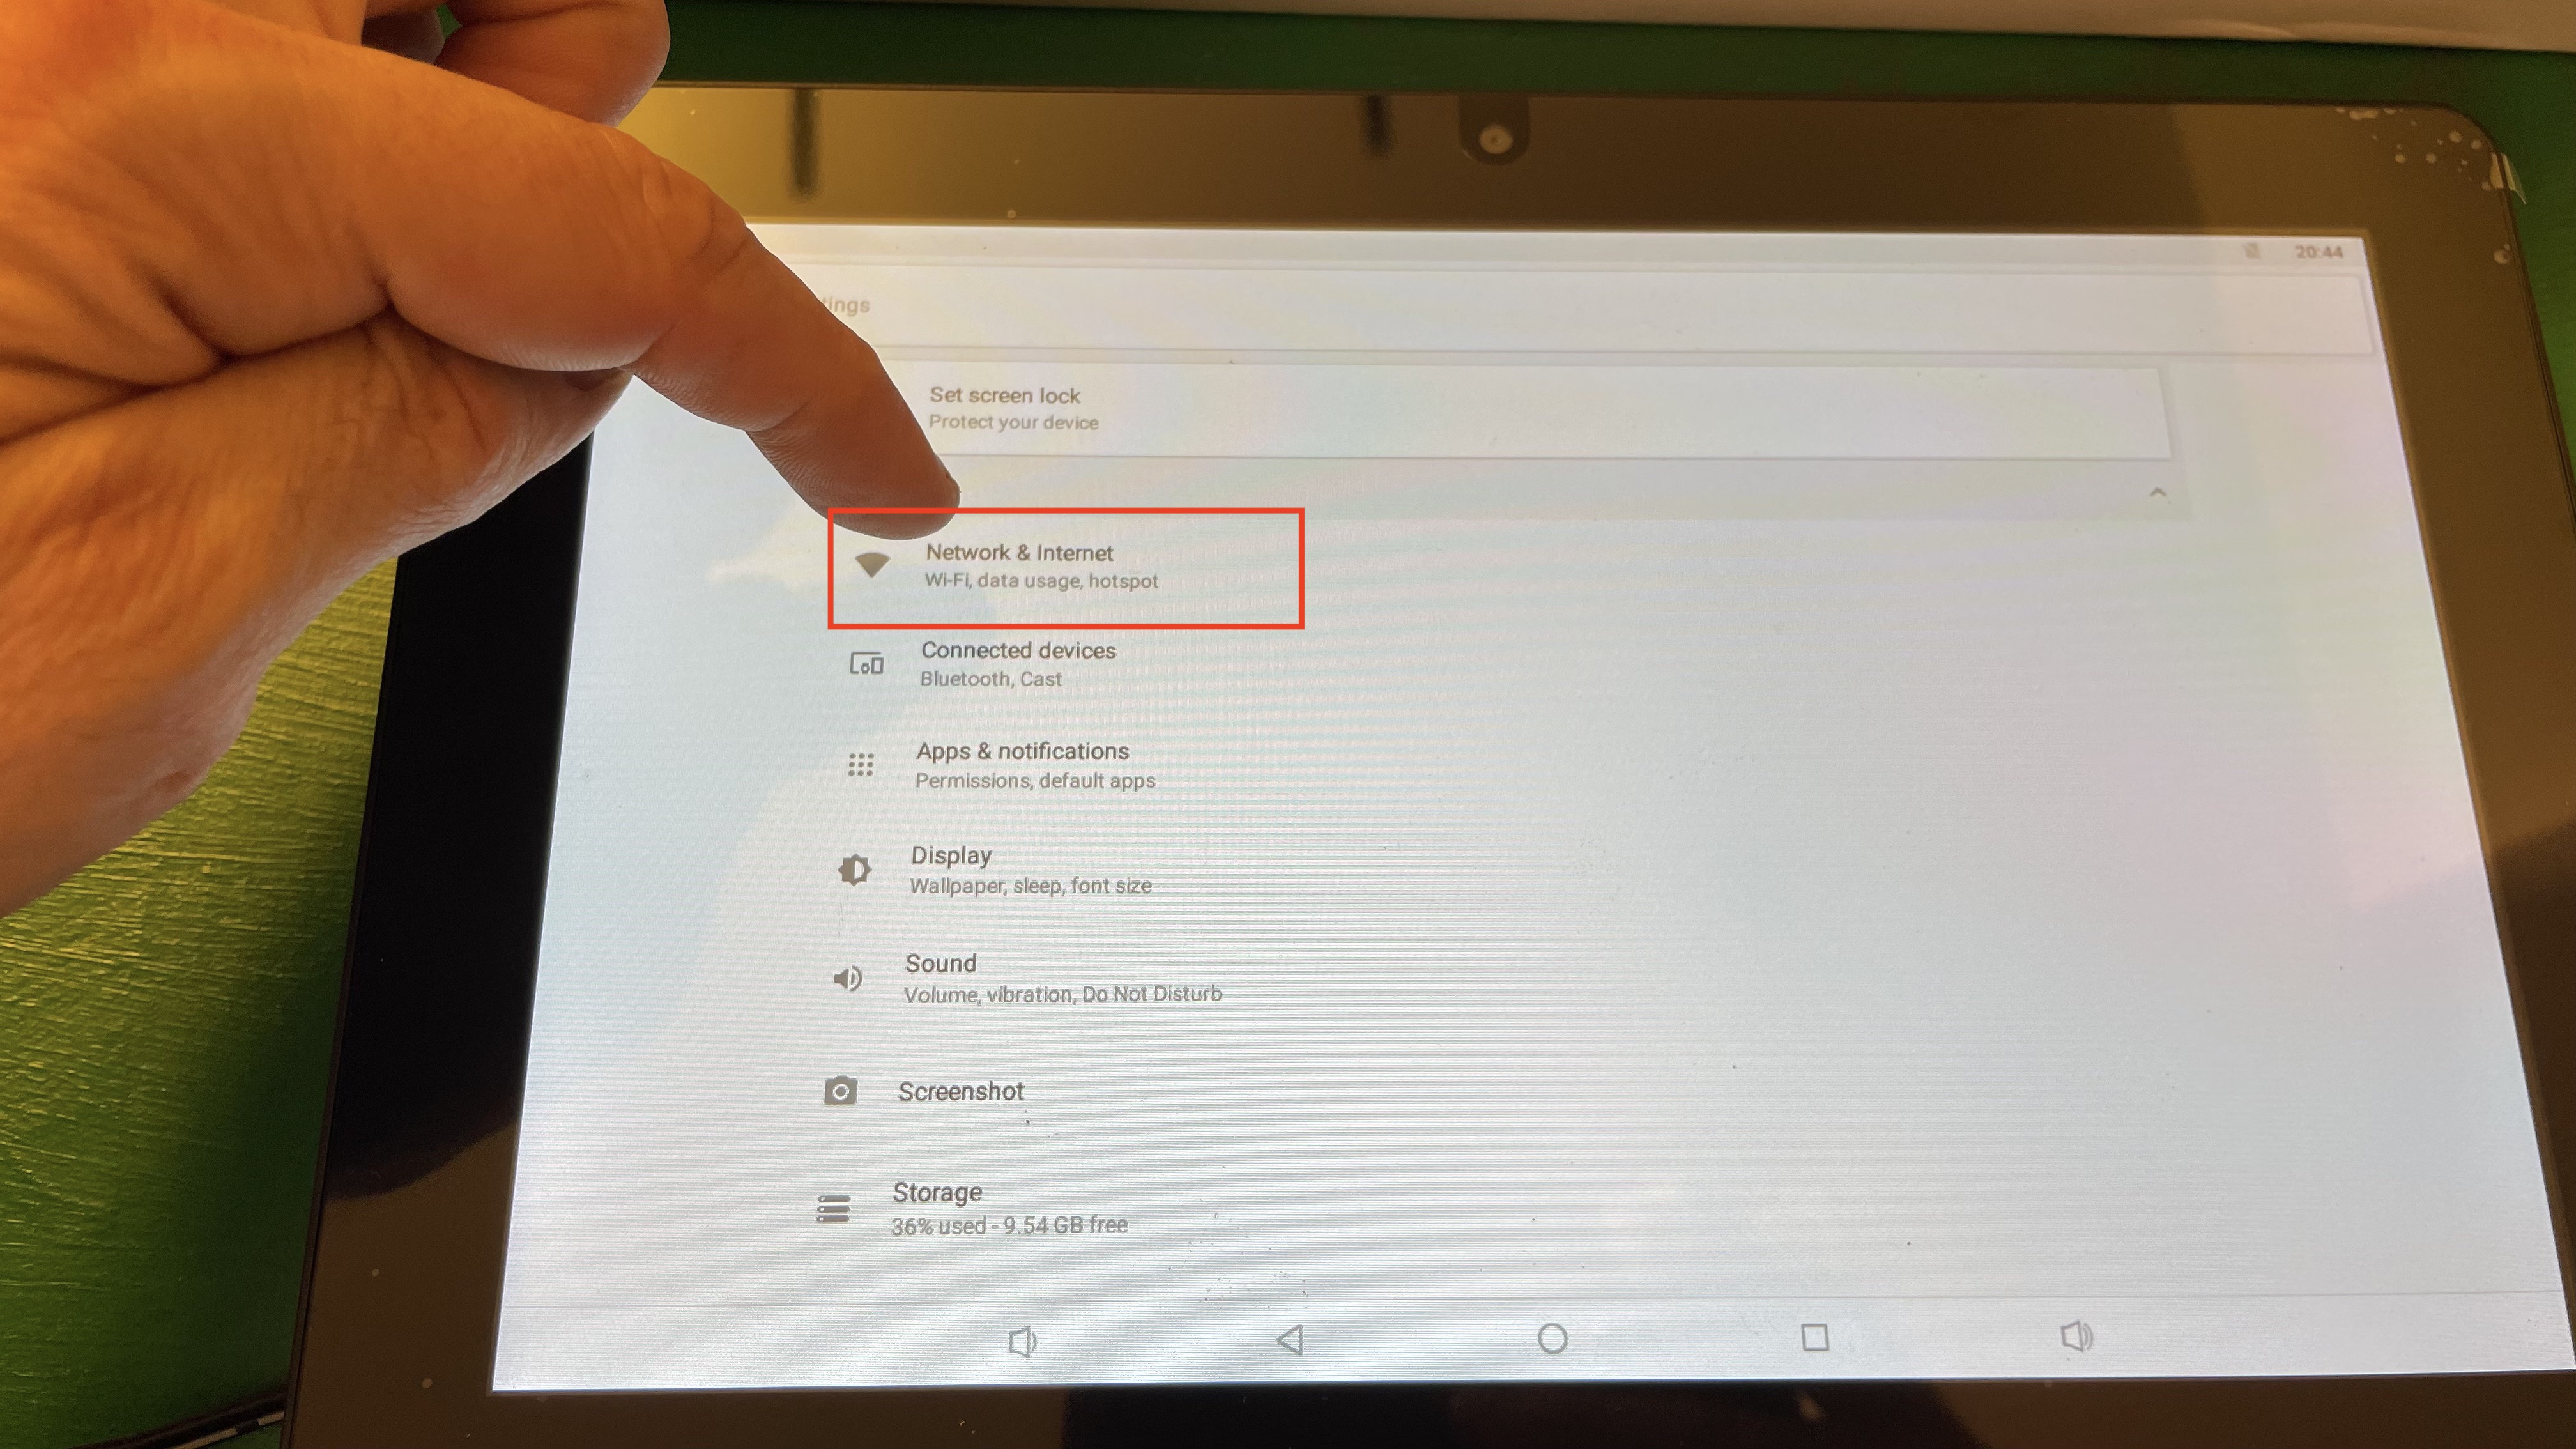
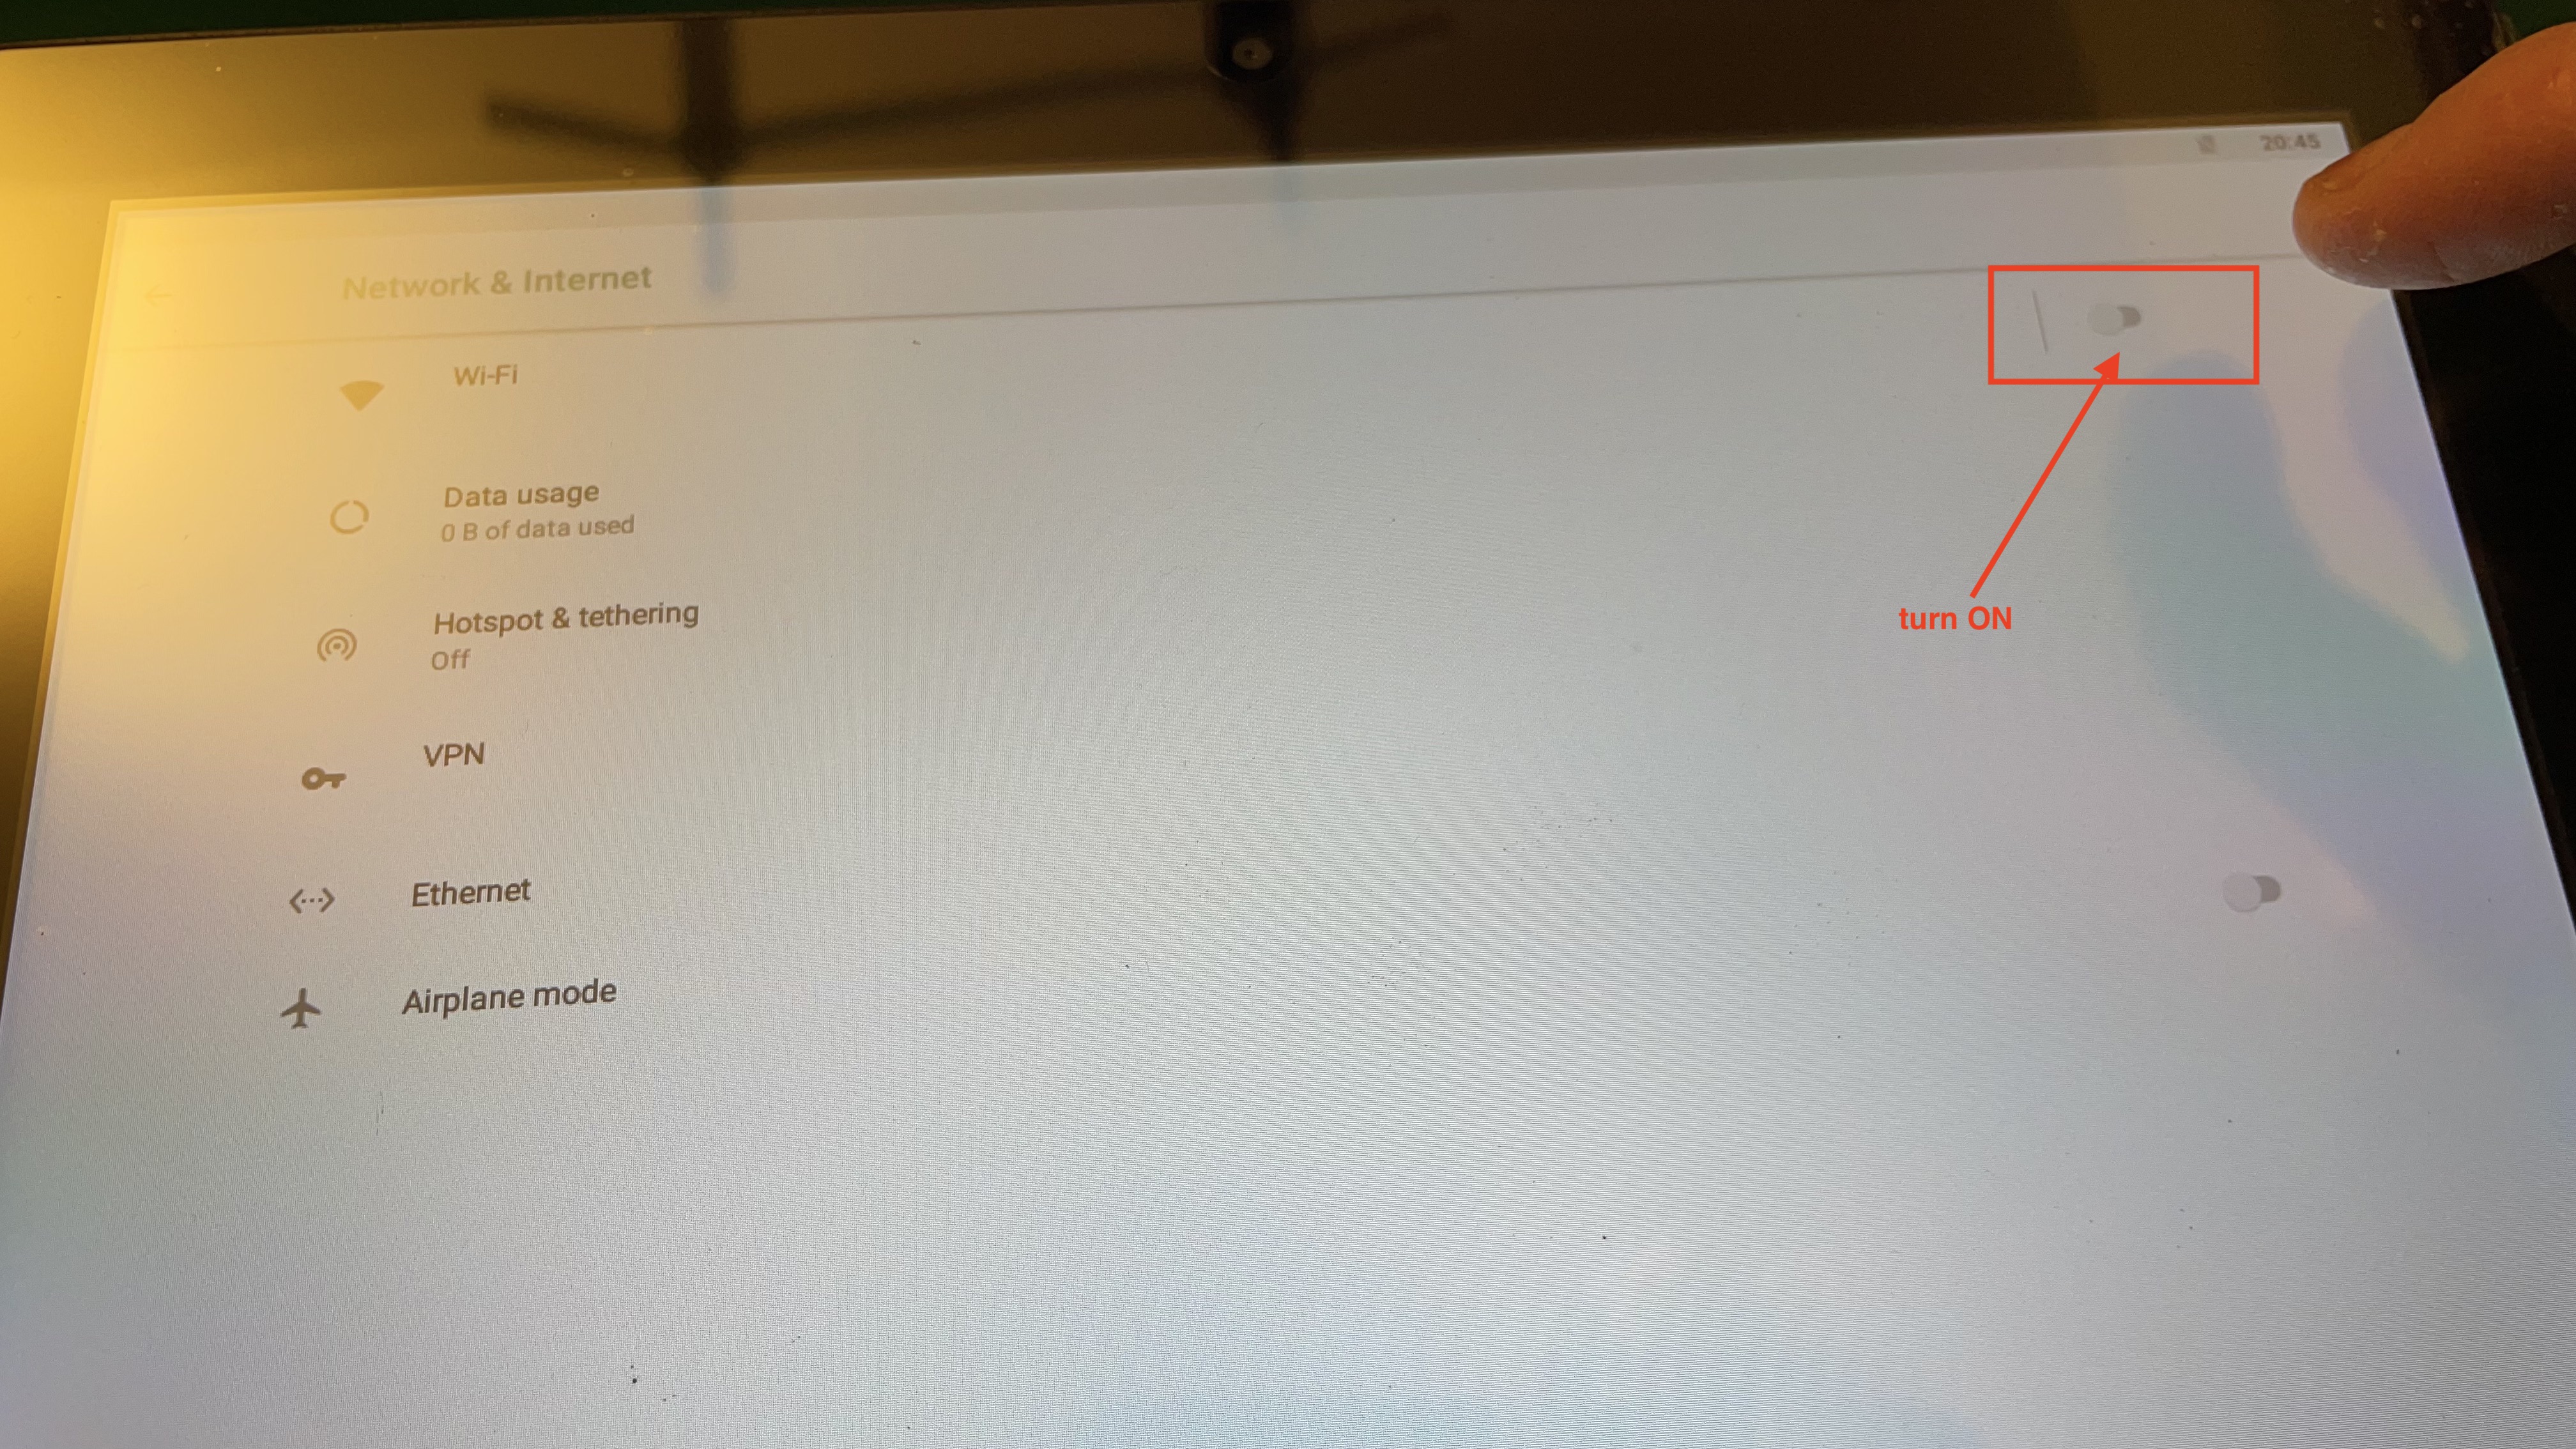
Click through to the Network & Internet section:
We will enable Wi-fi:
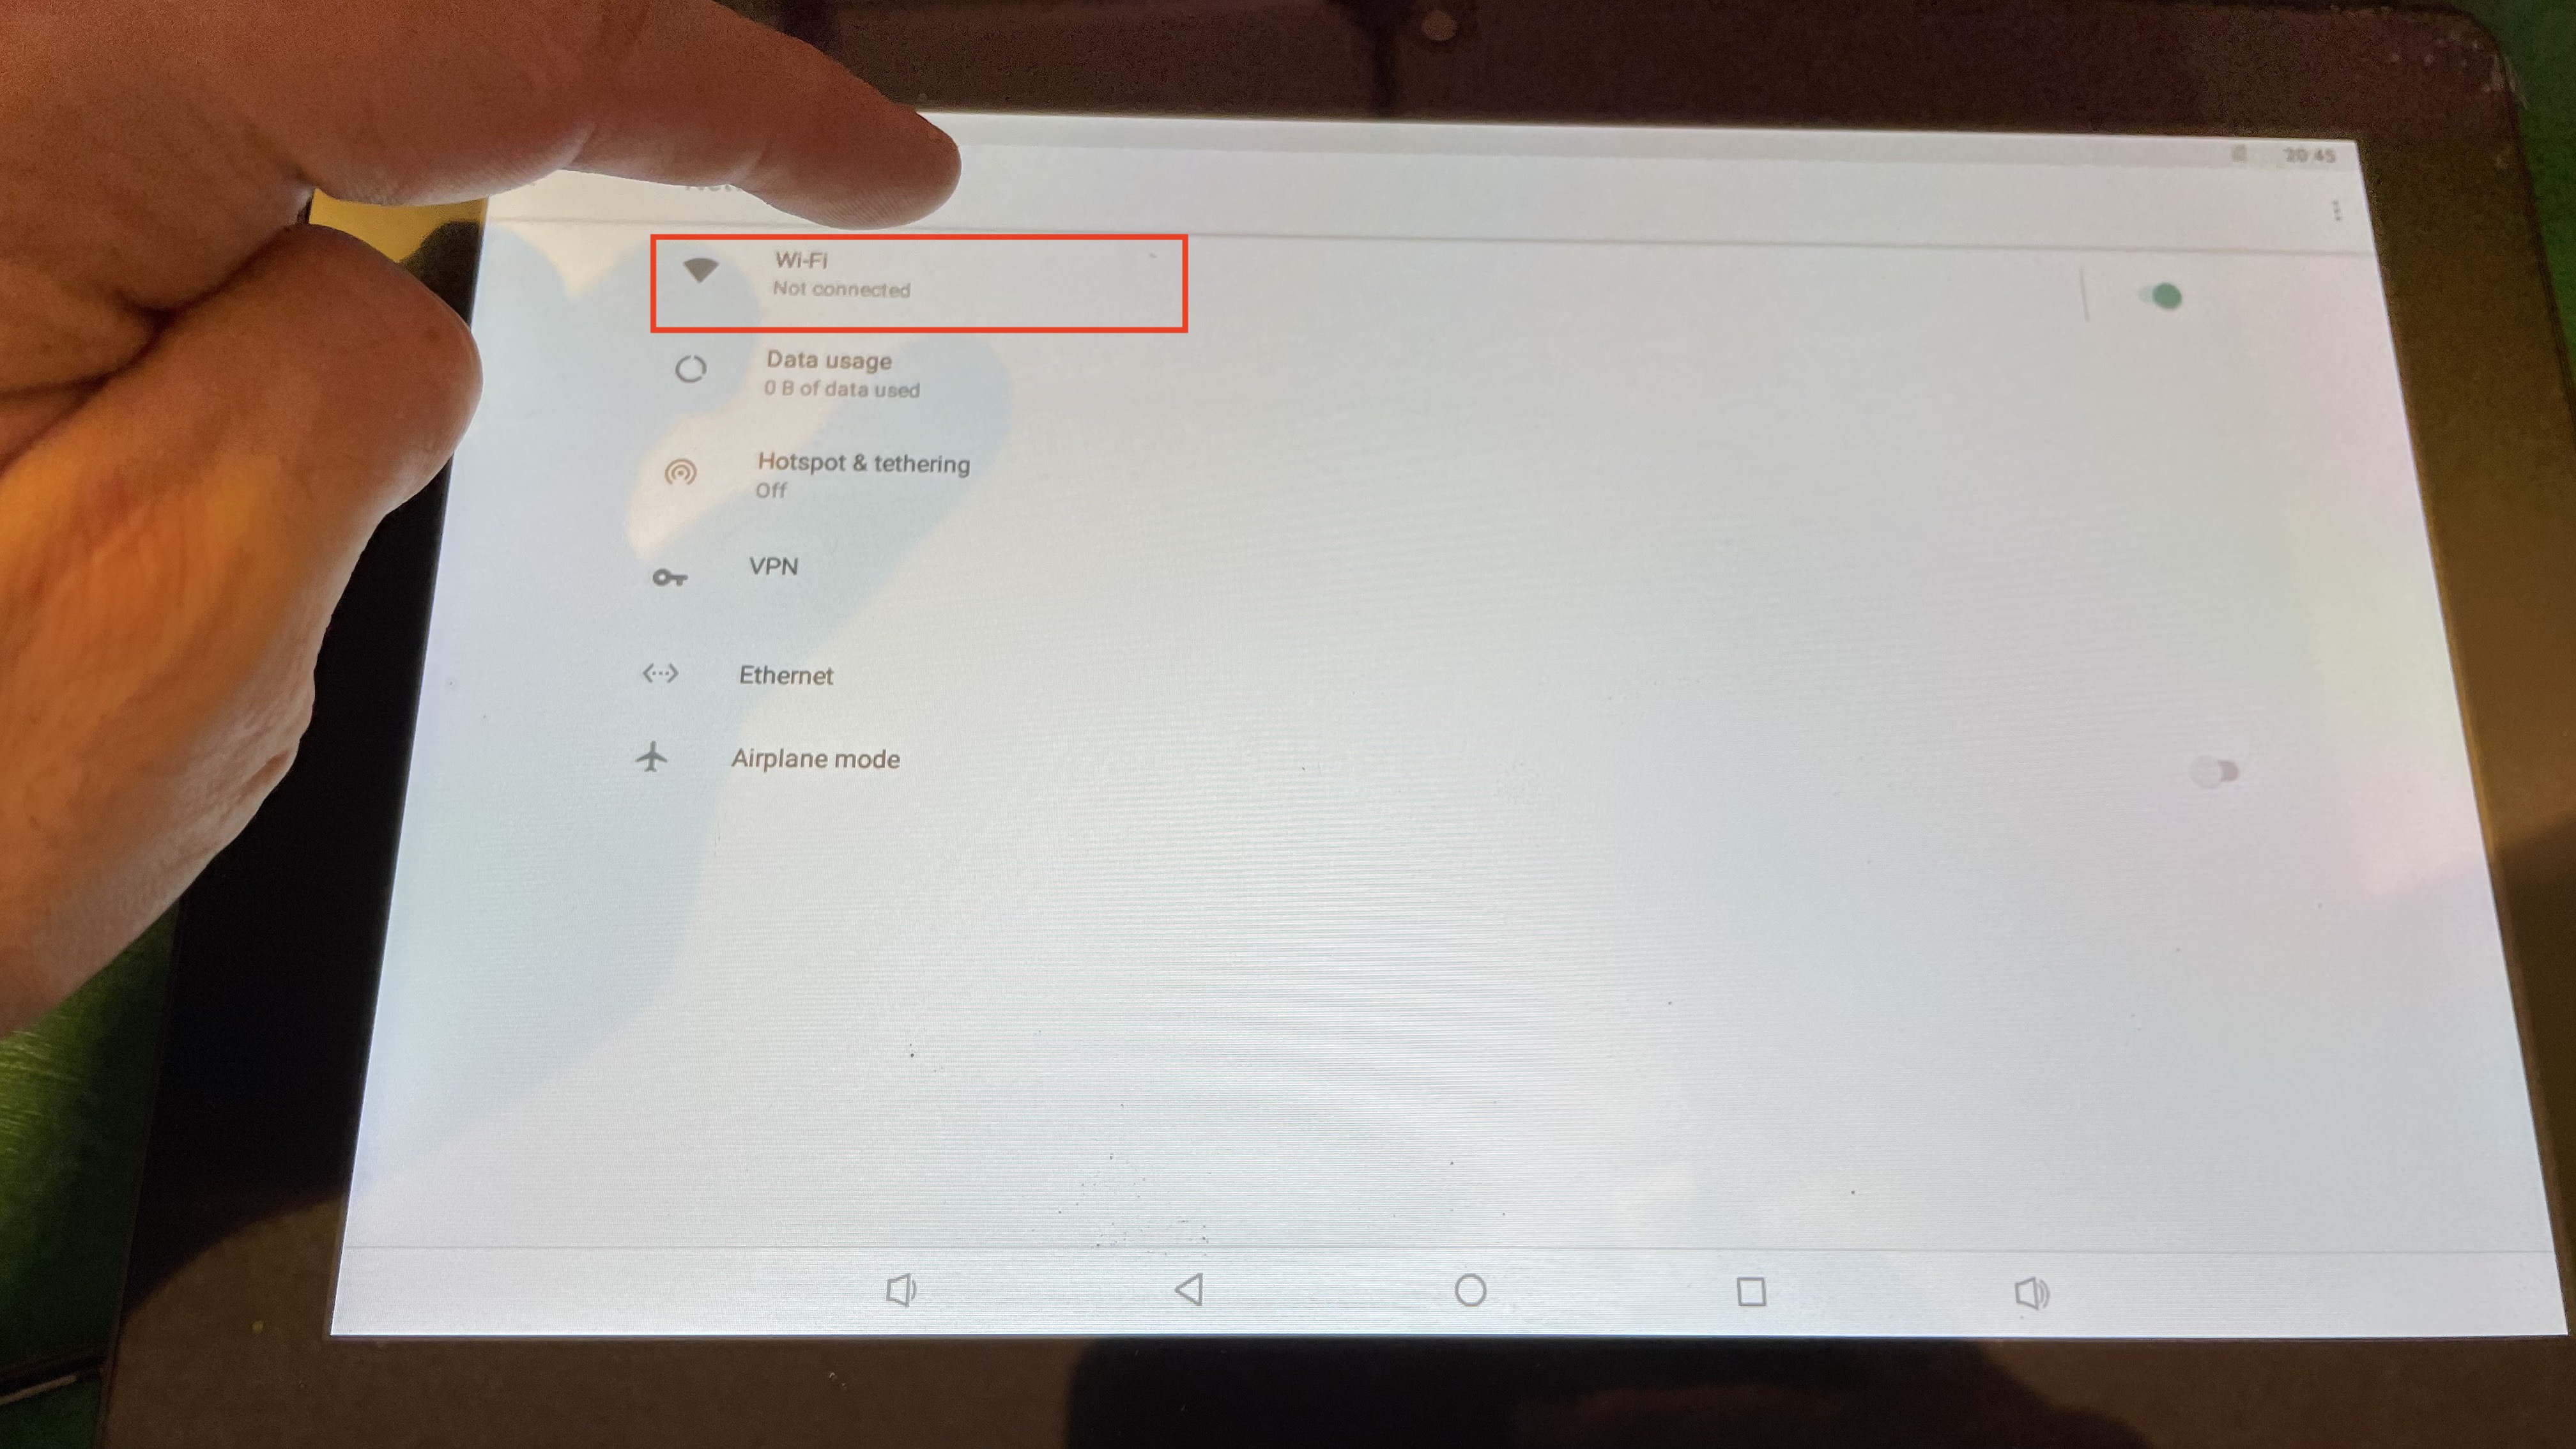
Now click on Wi-fi again to connect to a specific network:
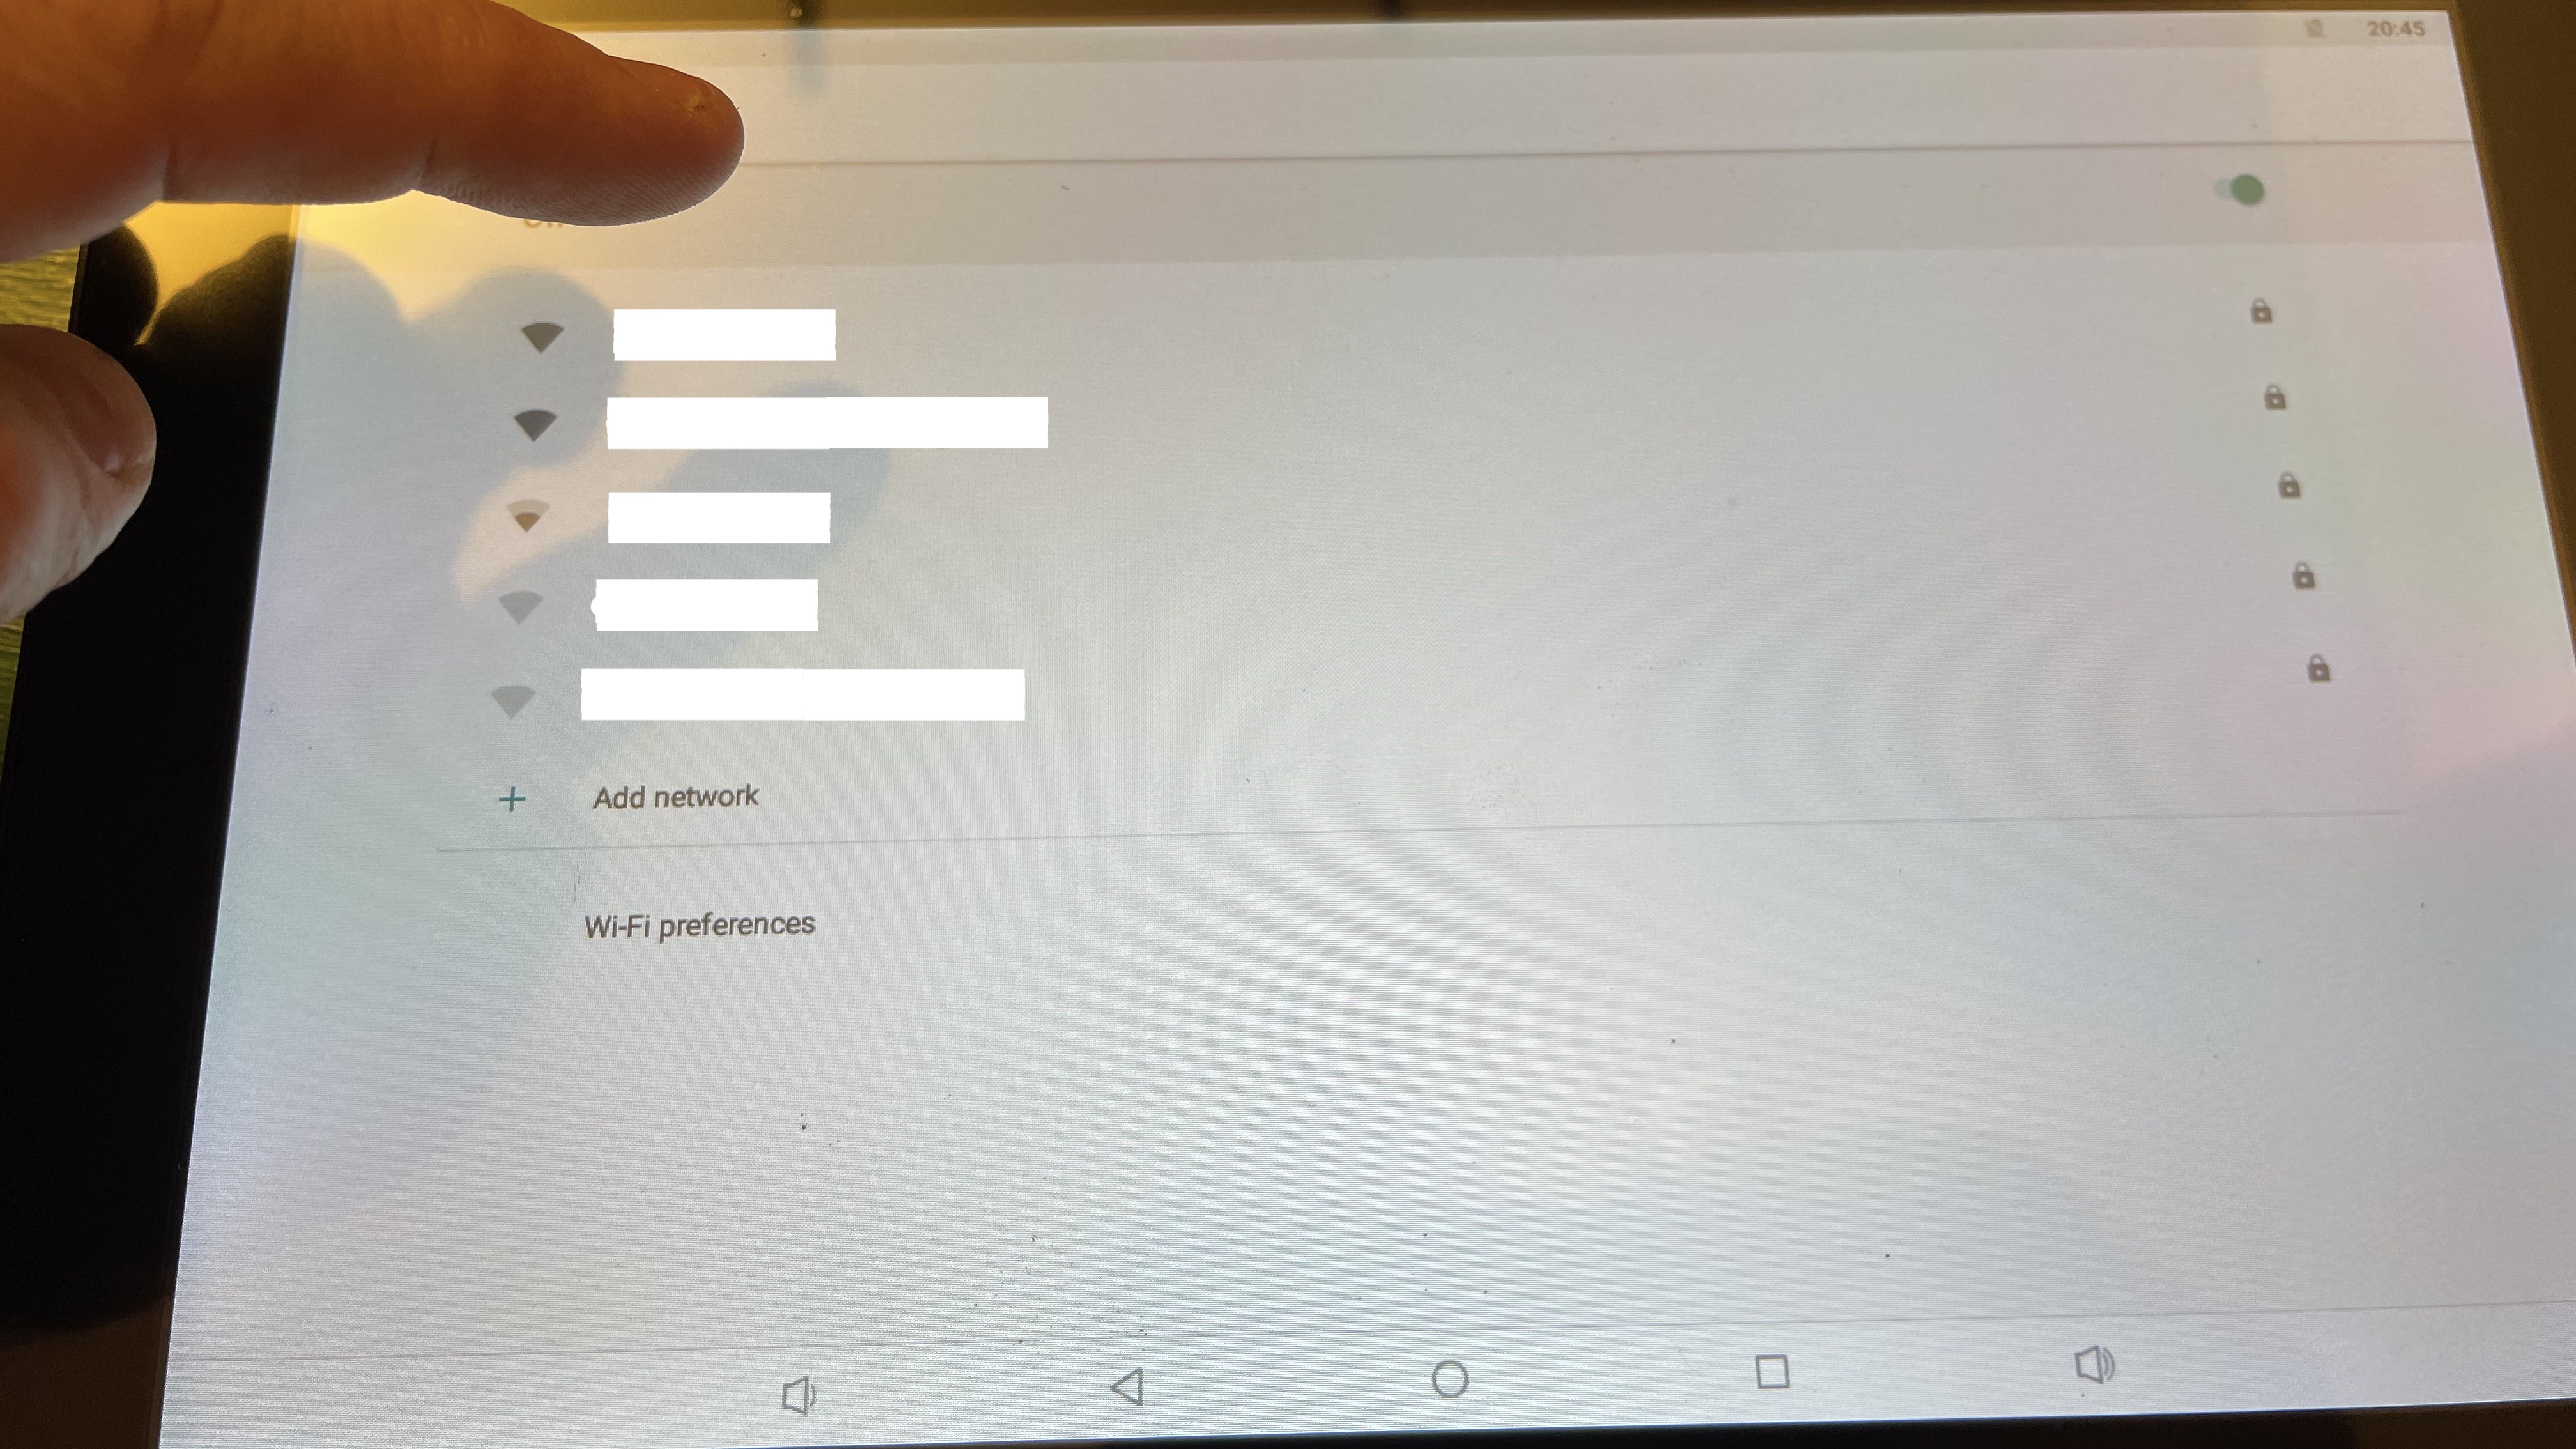
Select the desired Wi-fi and enter its password:
Click on the small arrow again to get to the menu:
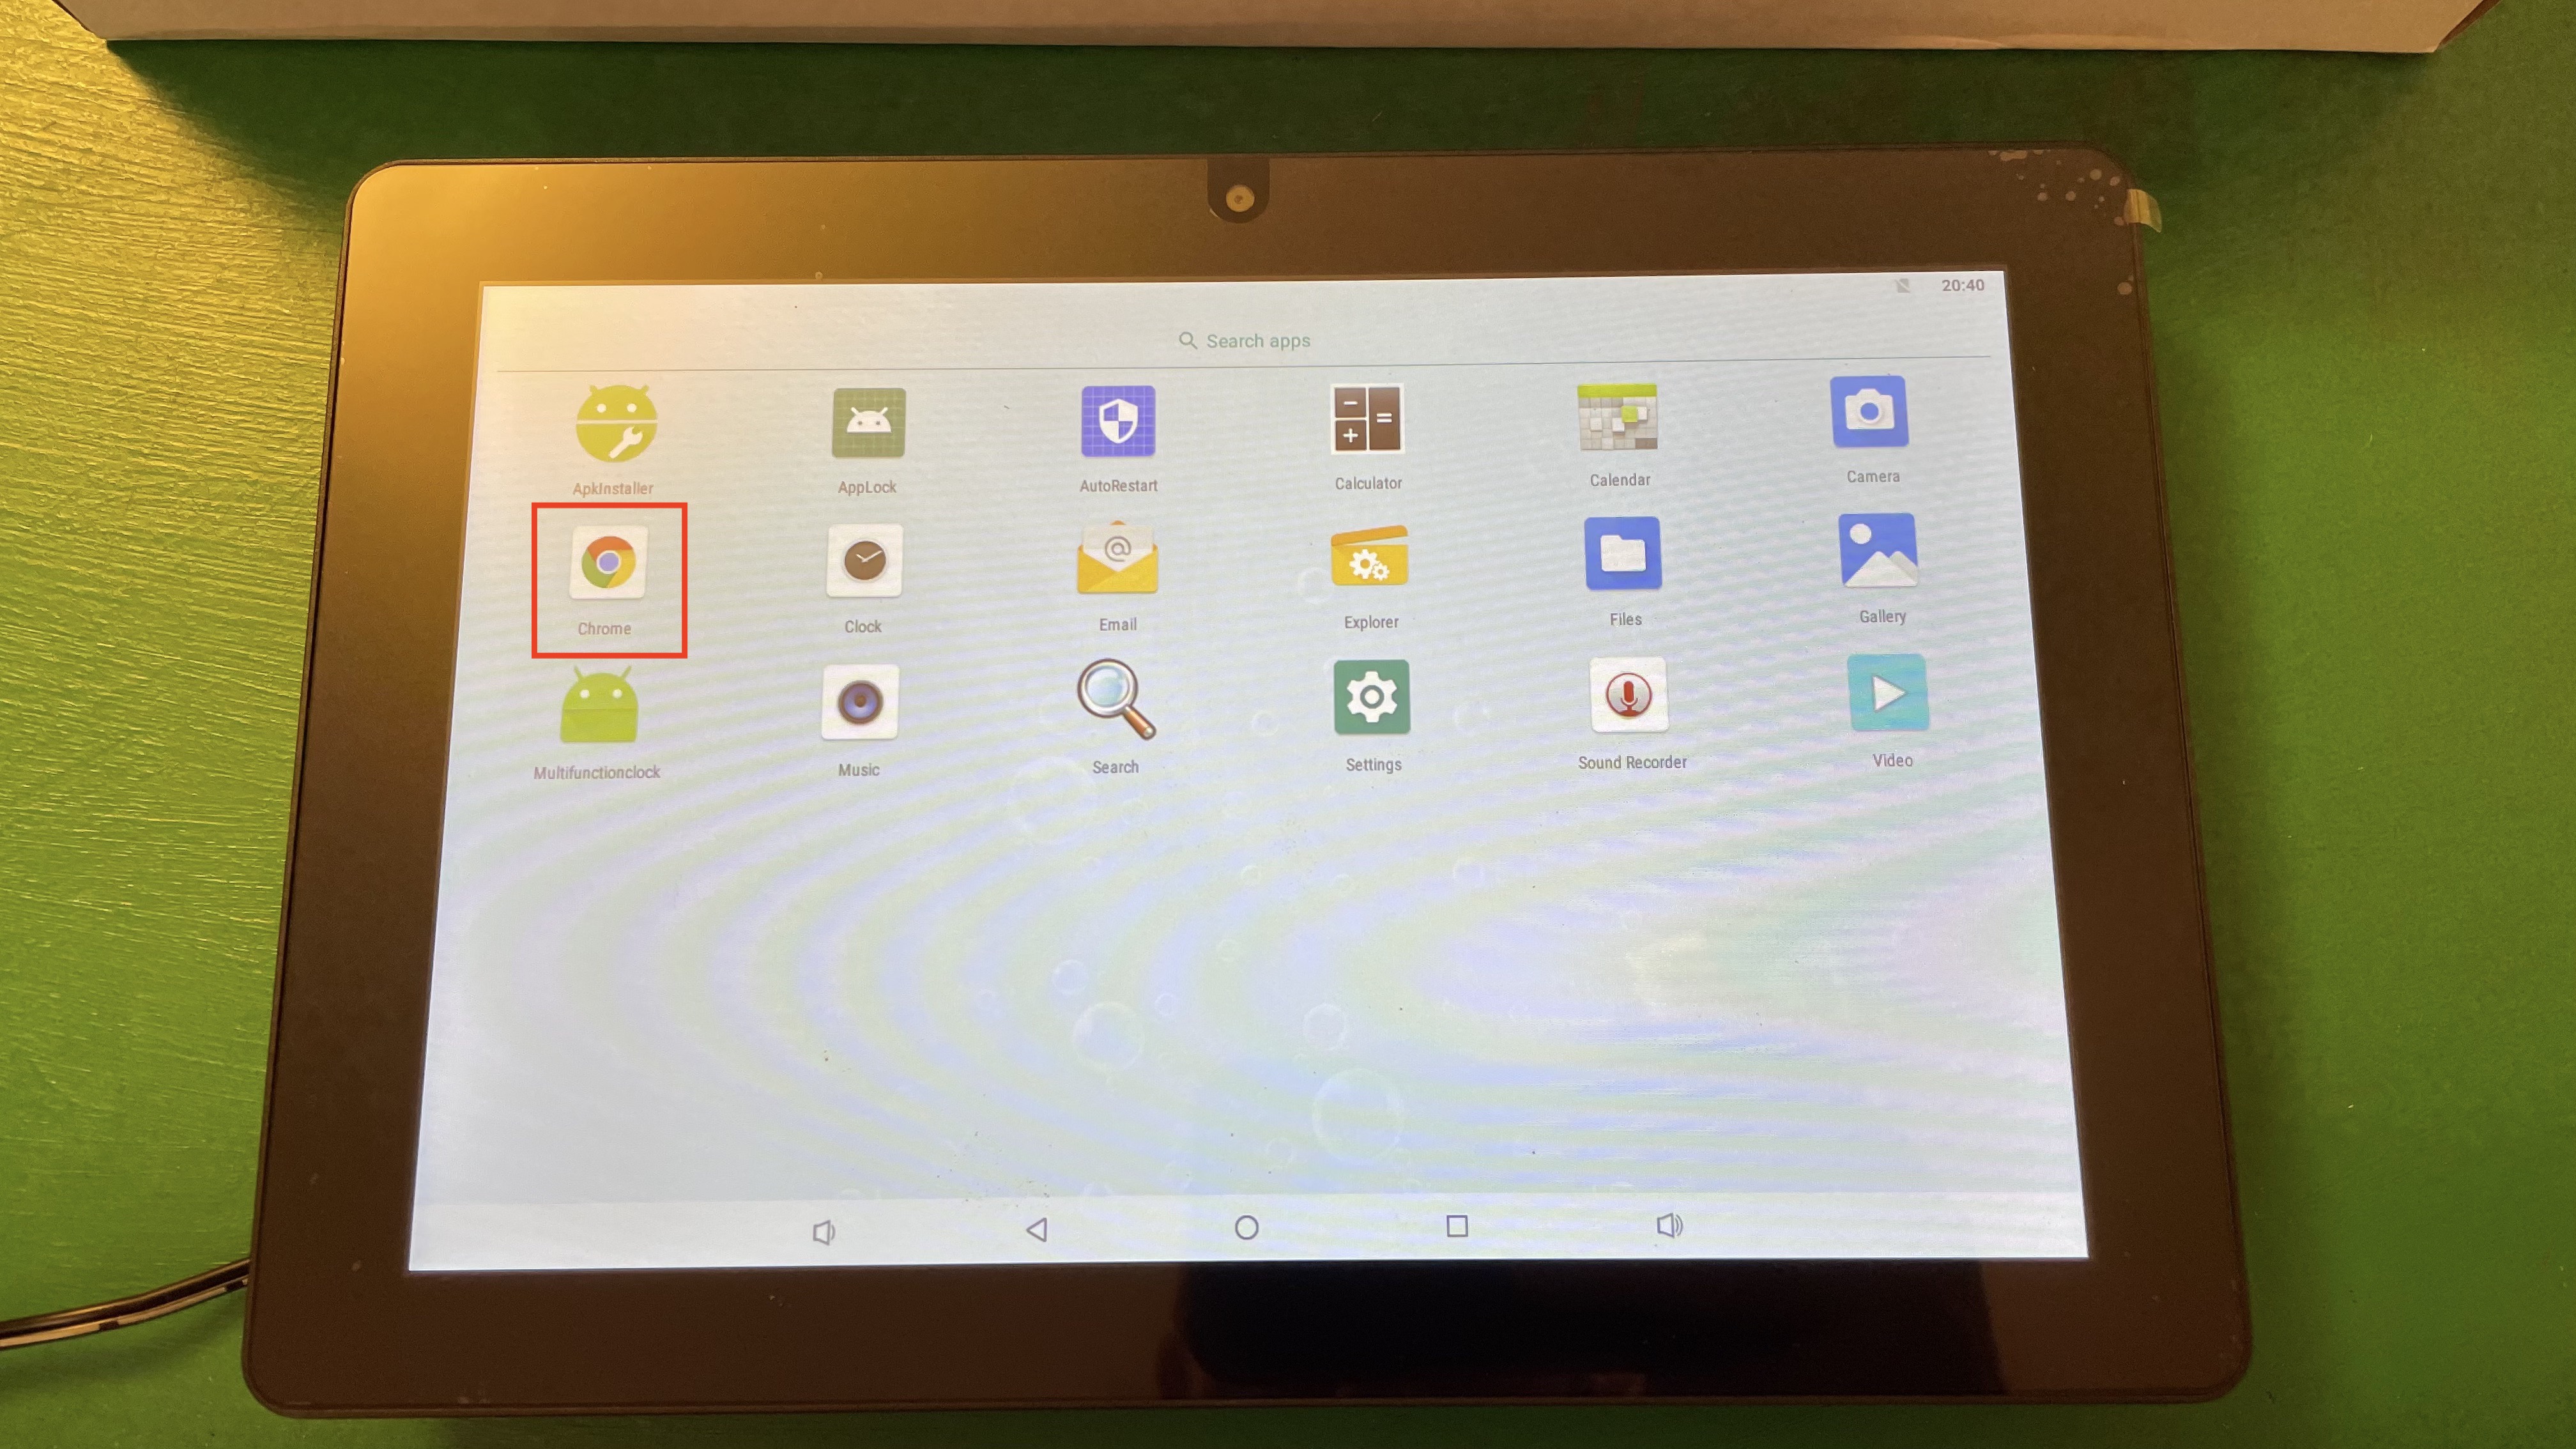
Launch Chrome, where the terminal works best:
In the URL line, type terminal.sloneek.com to log in to the terminal:

And we are already loading the Sloneek app 😊:

We choose a language:

Click on Sign in with a code and enter the login code you previously set up in the app under Settings / Terminals:
We have everything ready to load contactless cards. For easier manipulation with the terminal we can expand the whole window:
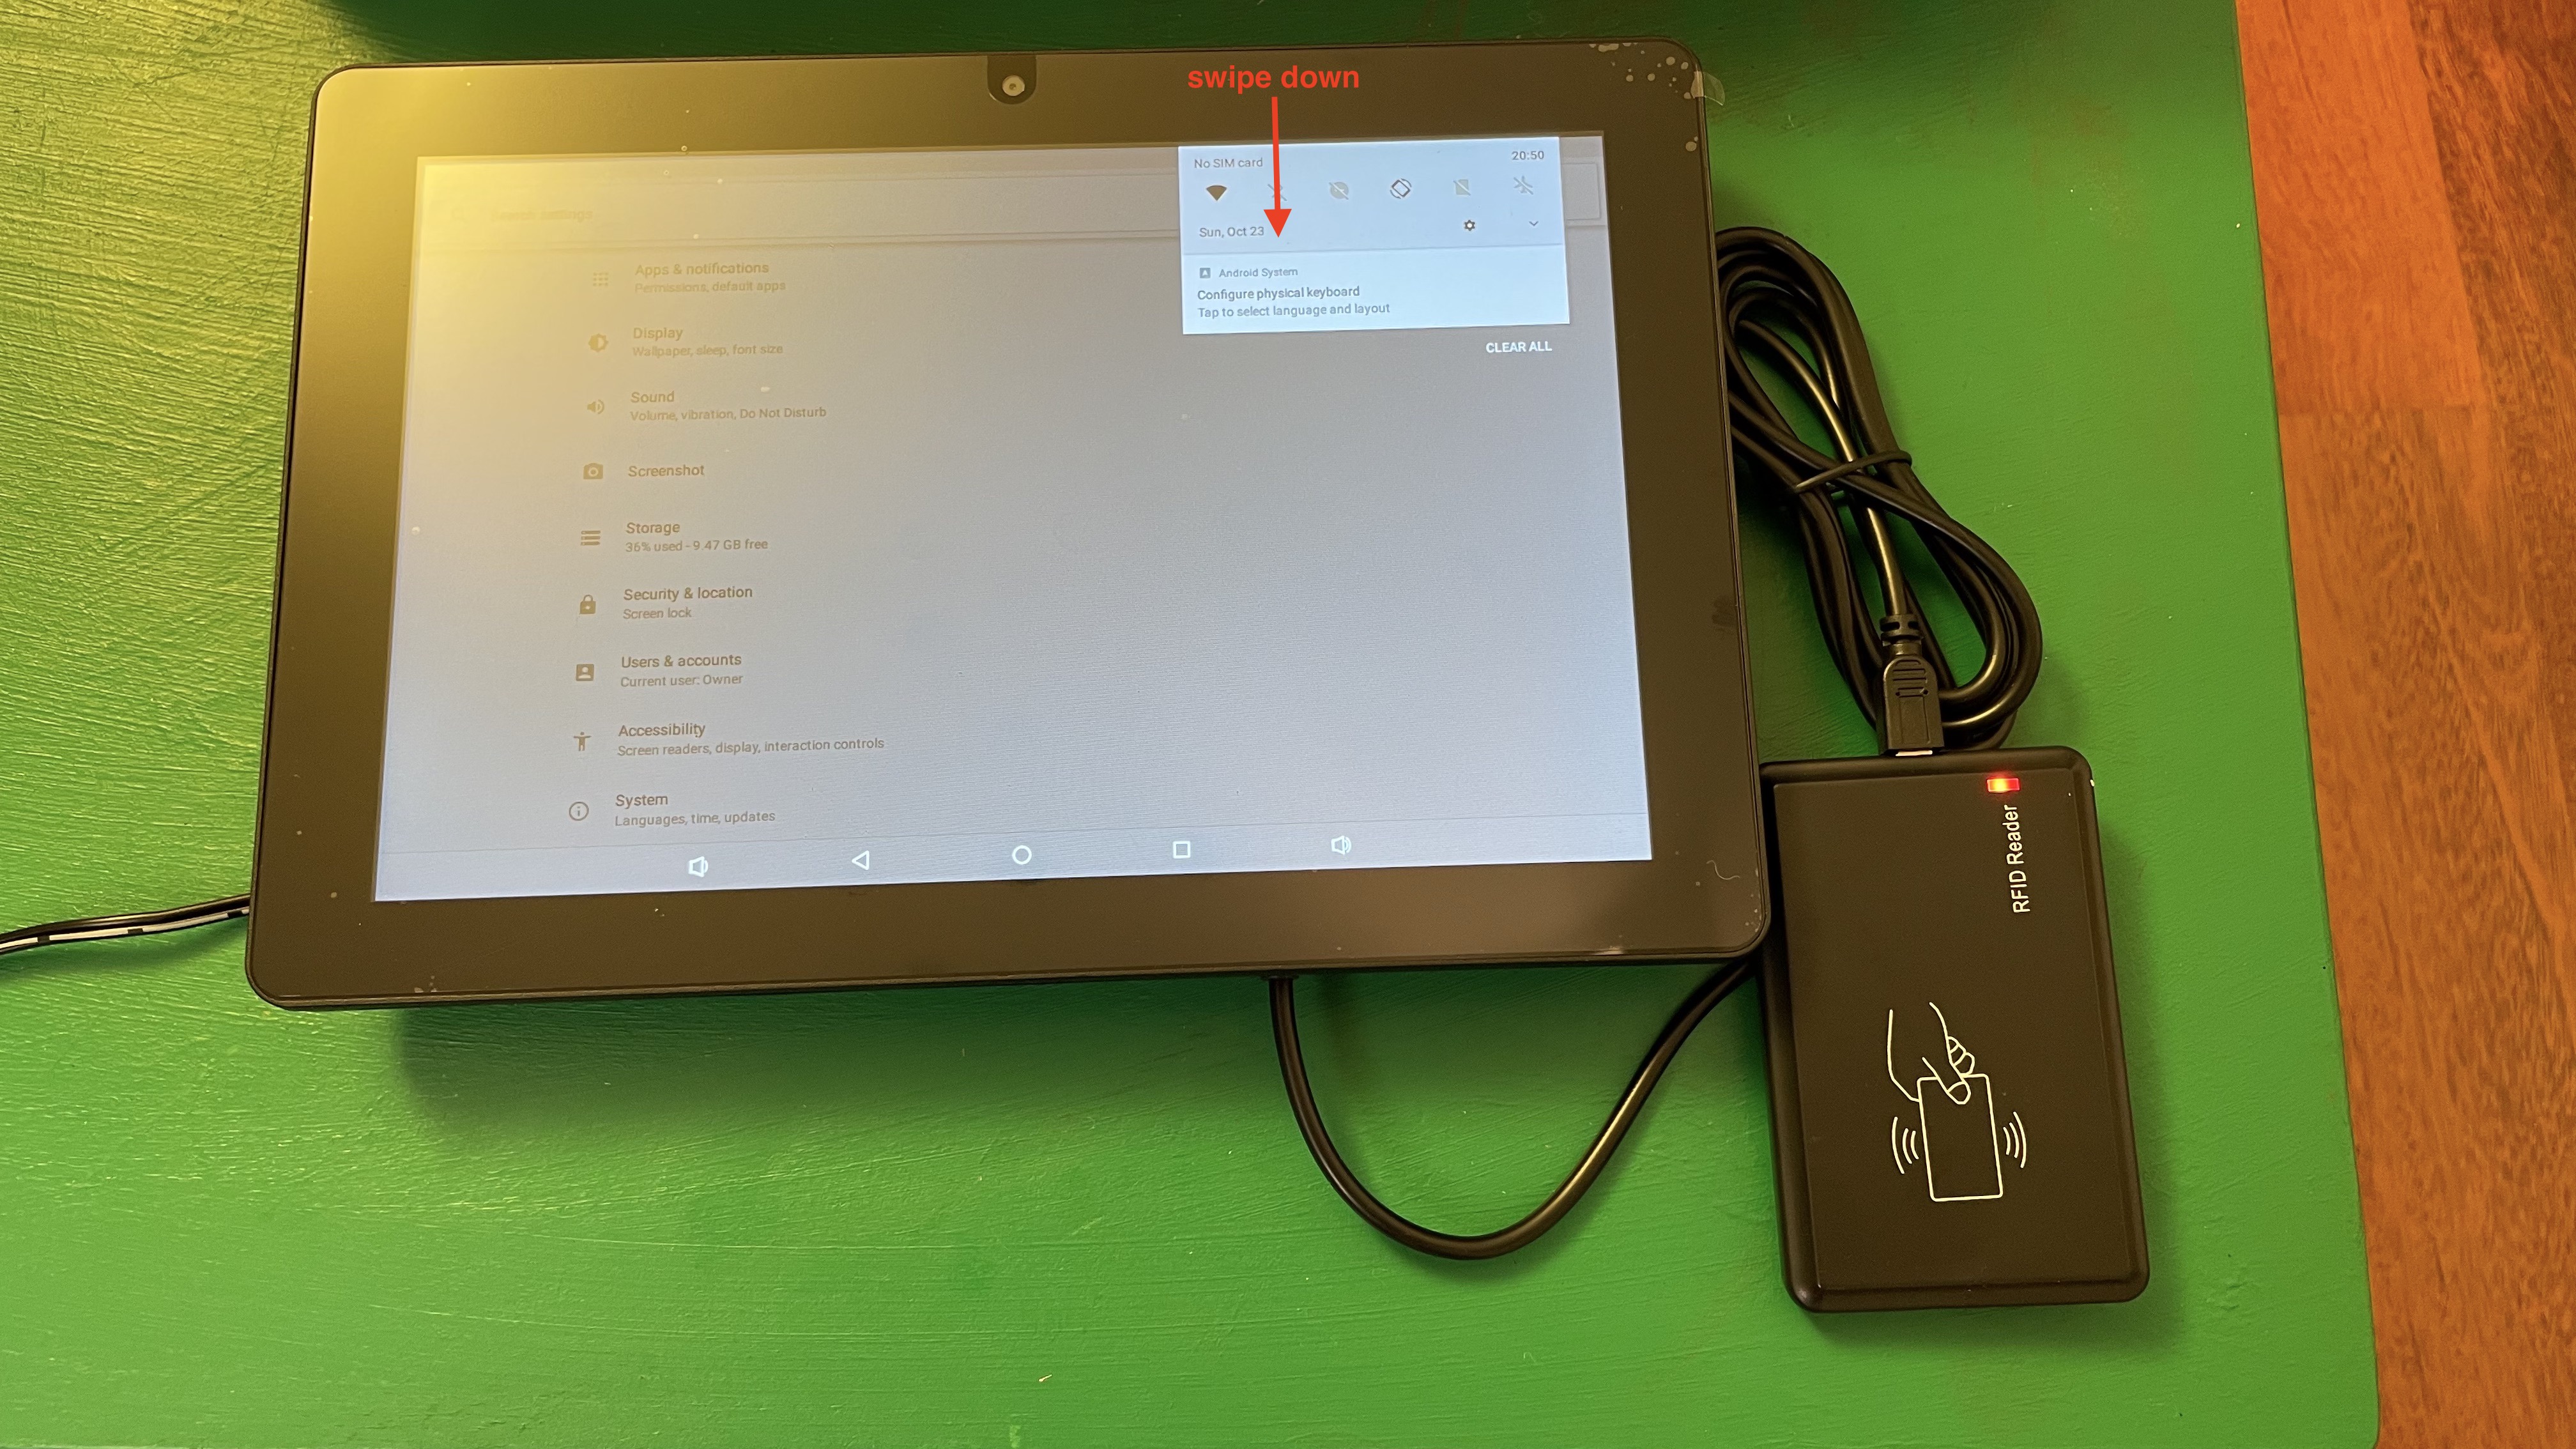
When connecting a USB card reader, it is better to disable the software keyboard. Therefore, first swipe the screen downwards:
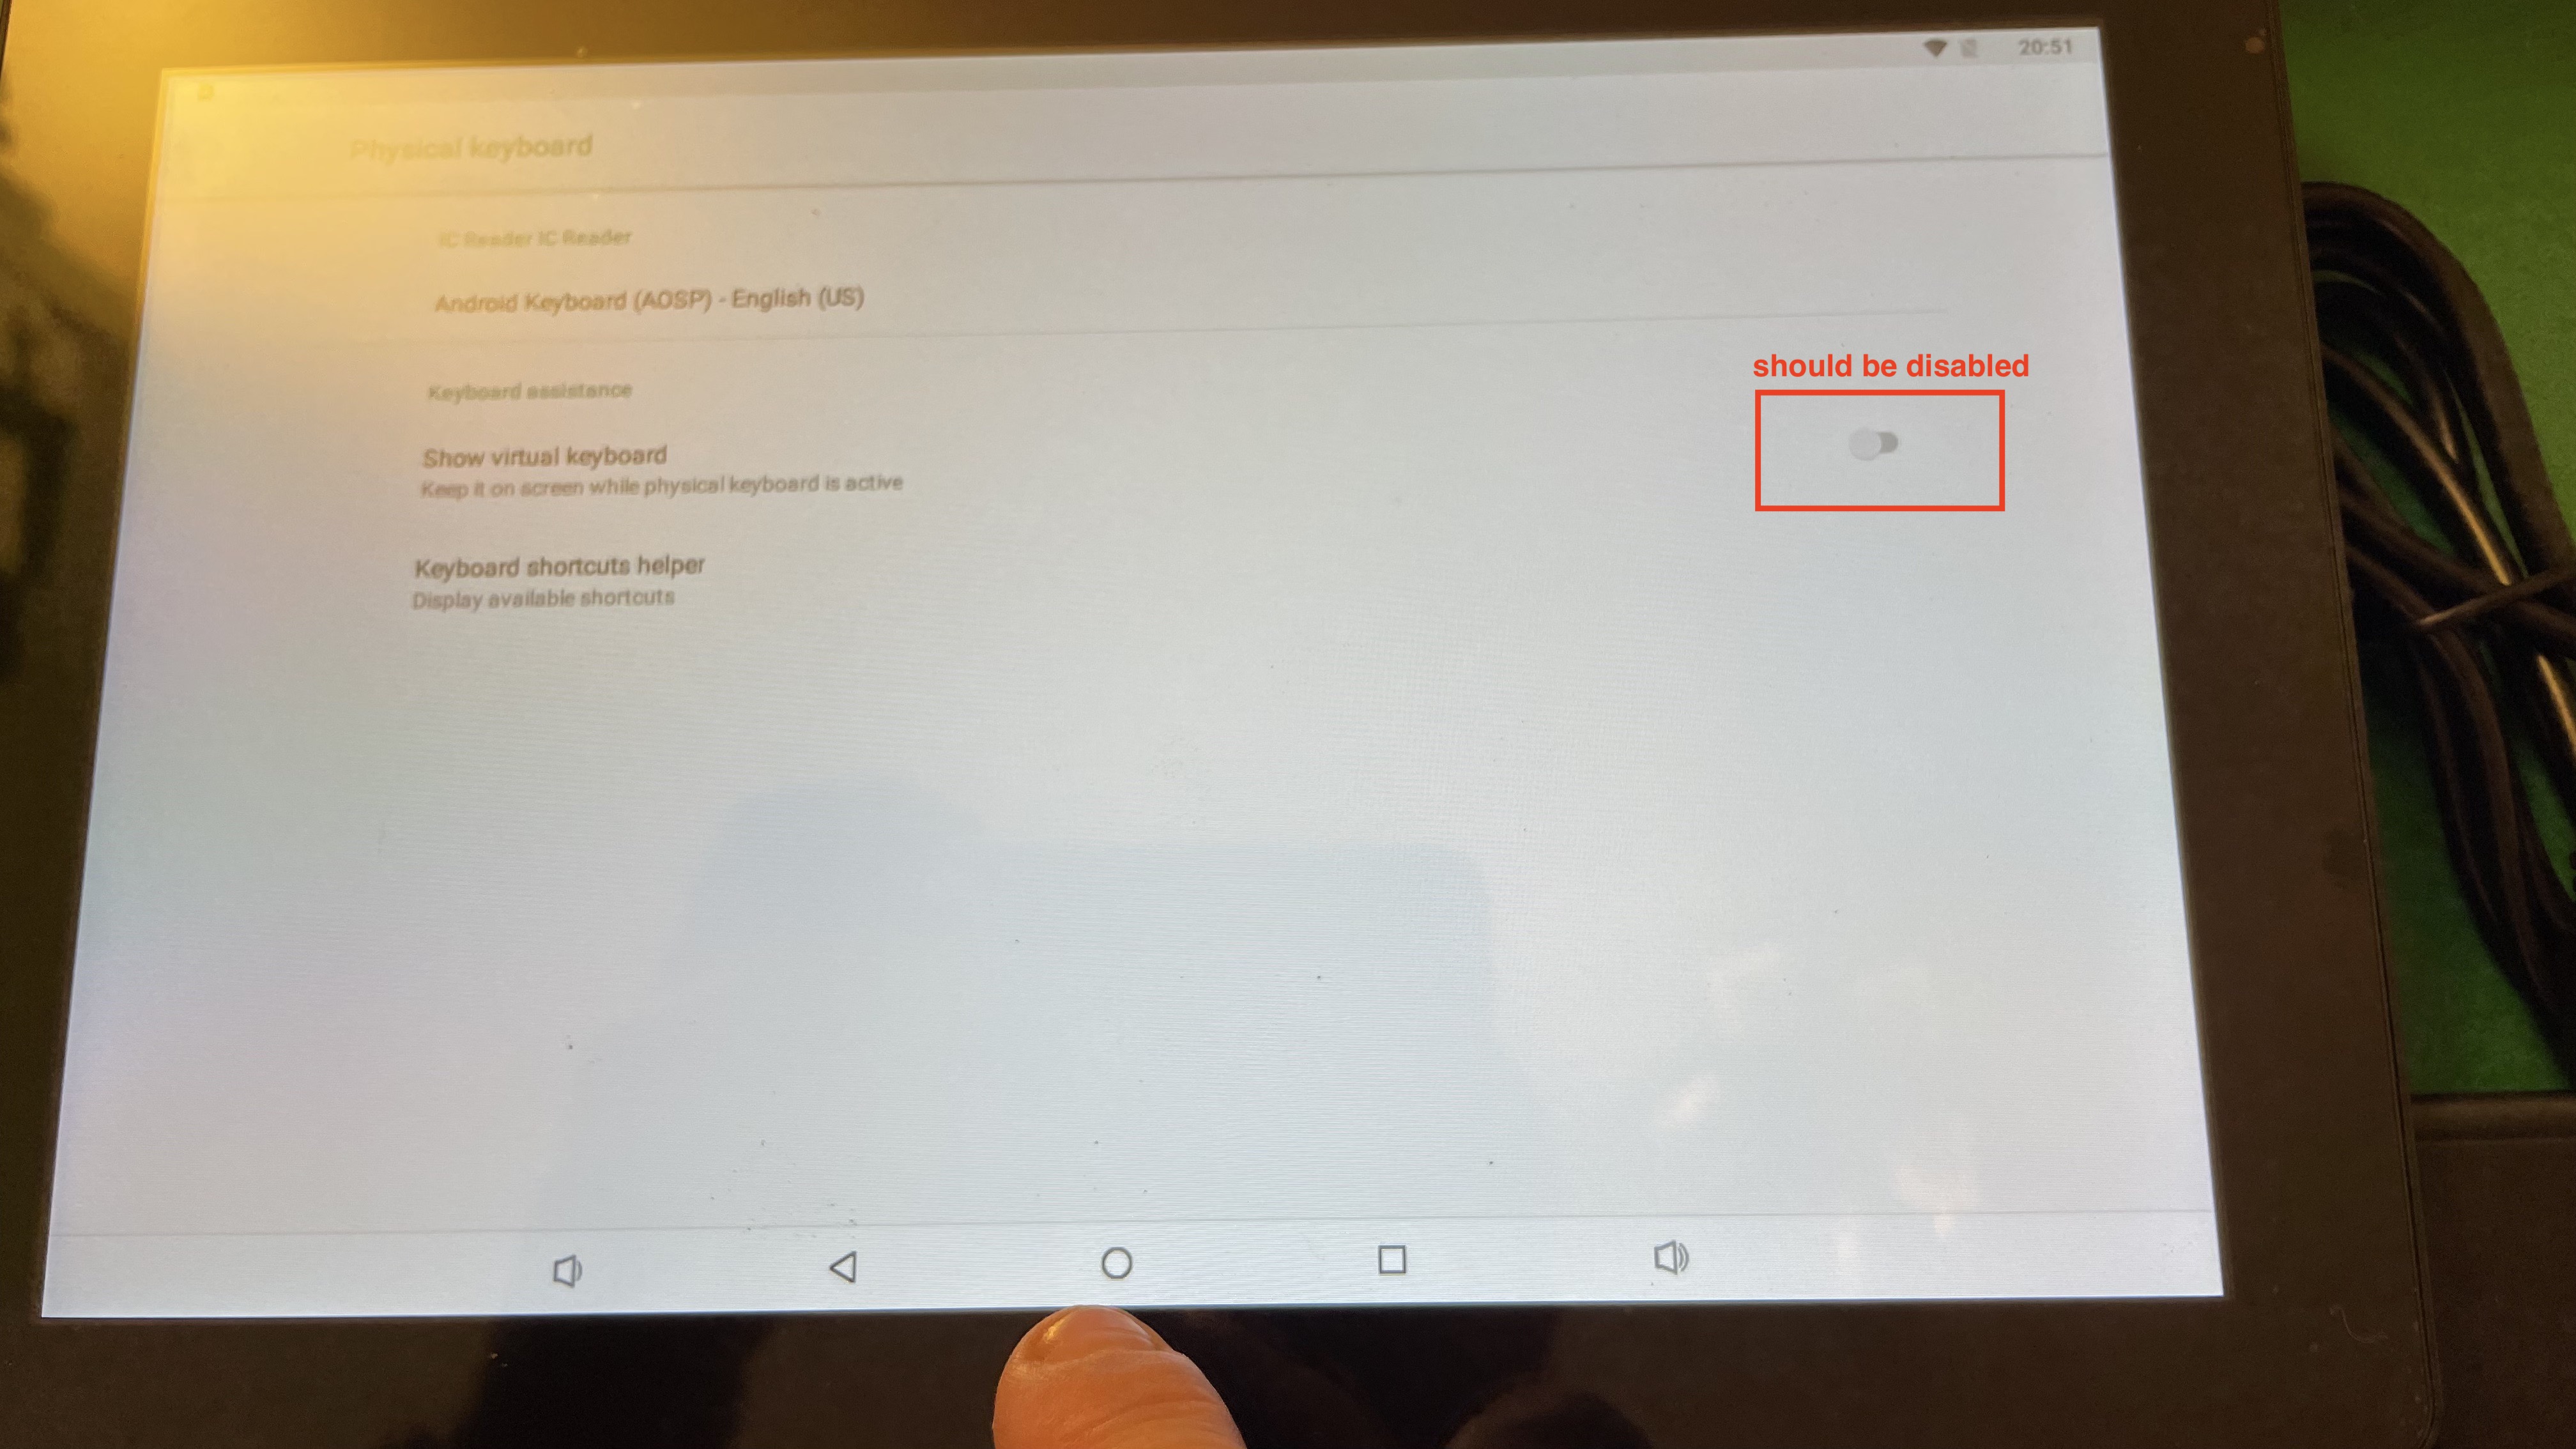
And then click the small toggle next to Show virtual keyboard to turn off the keyboard:
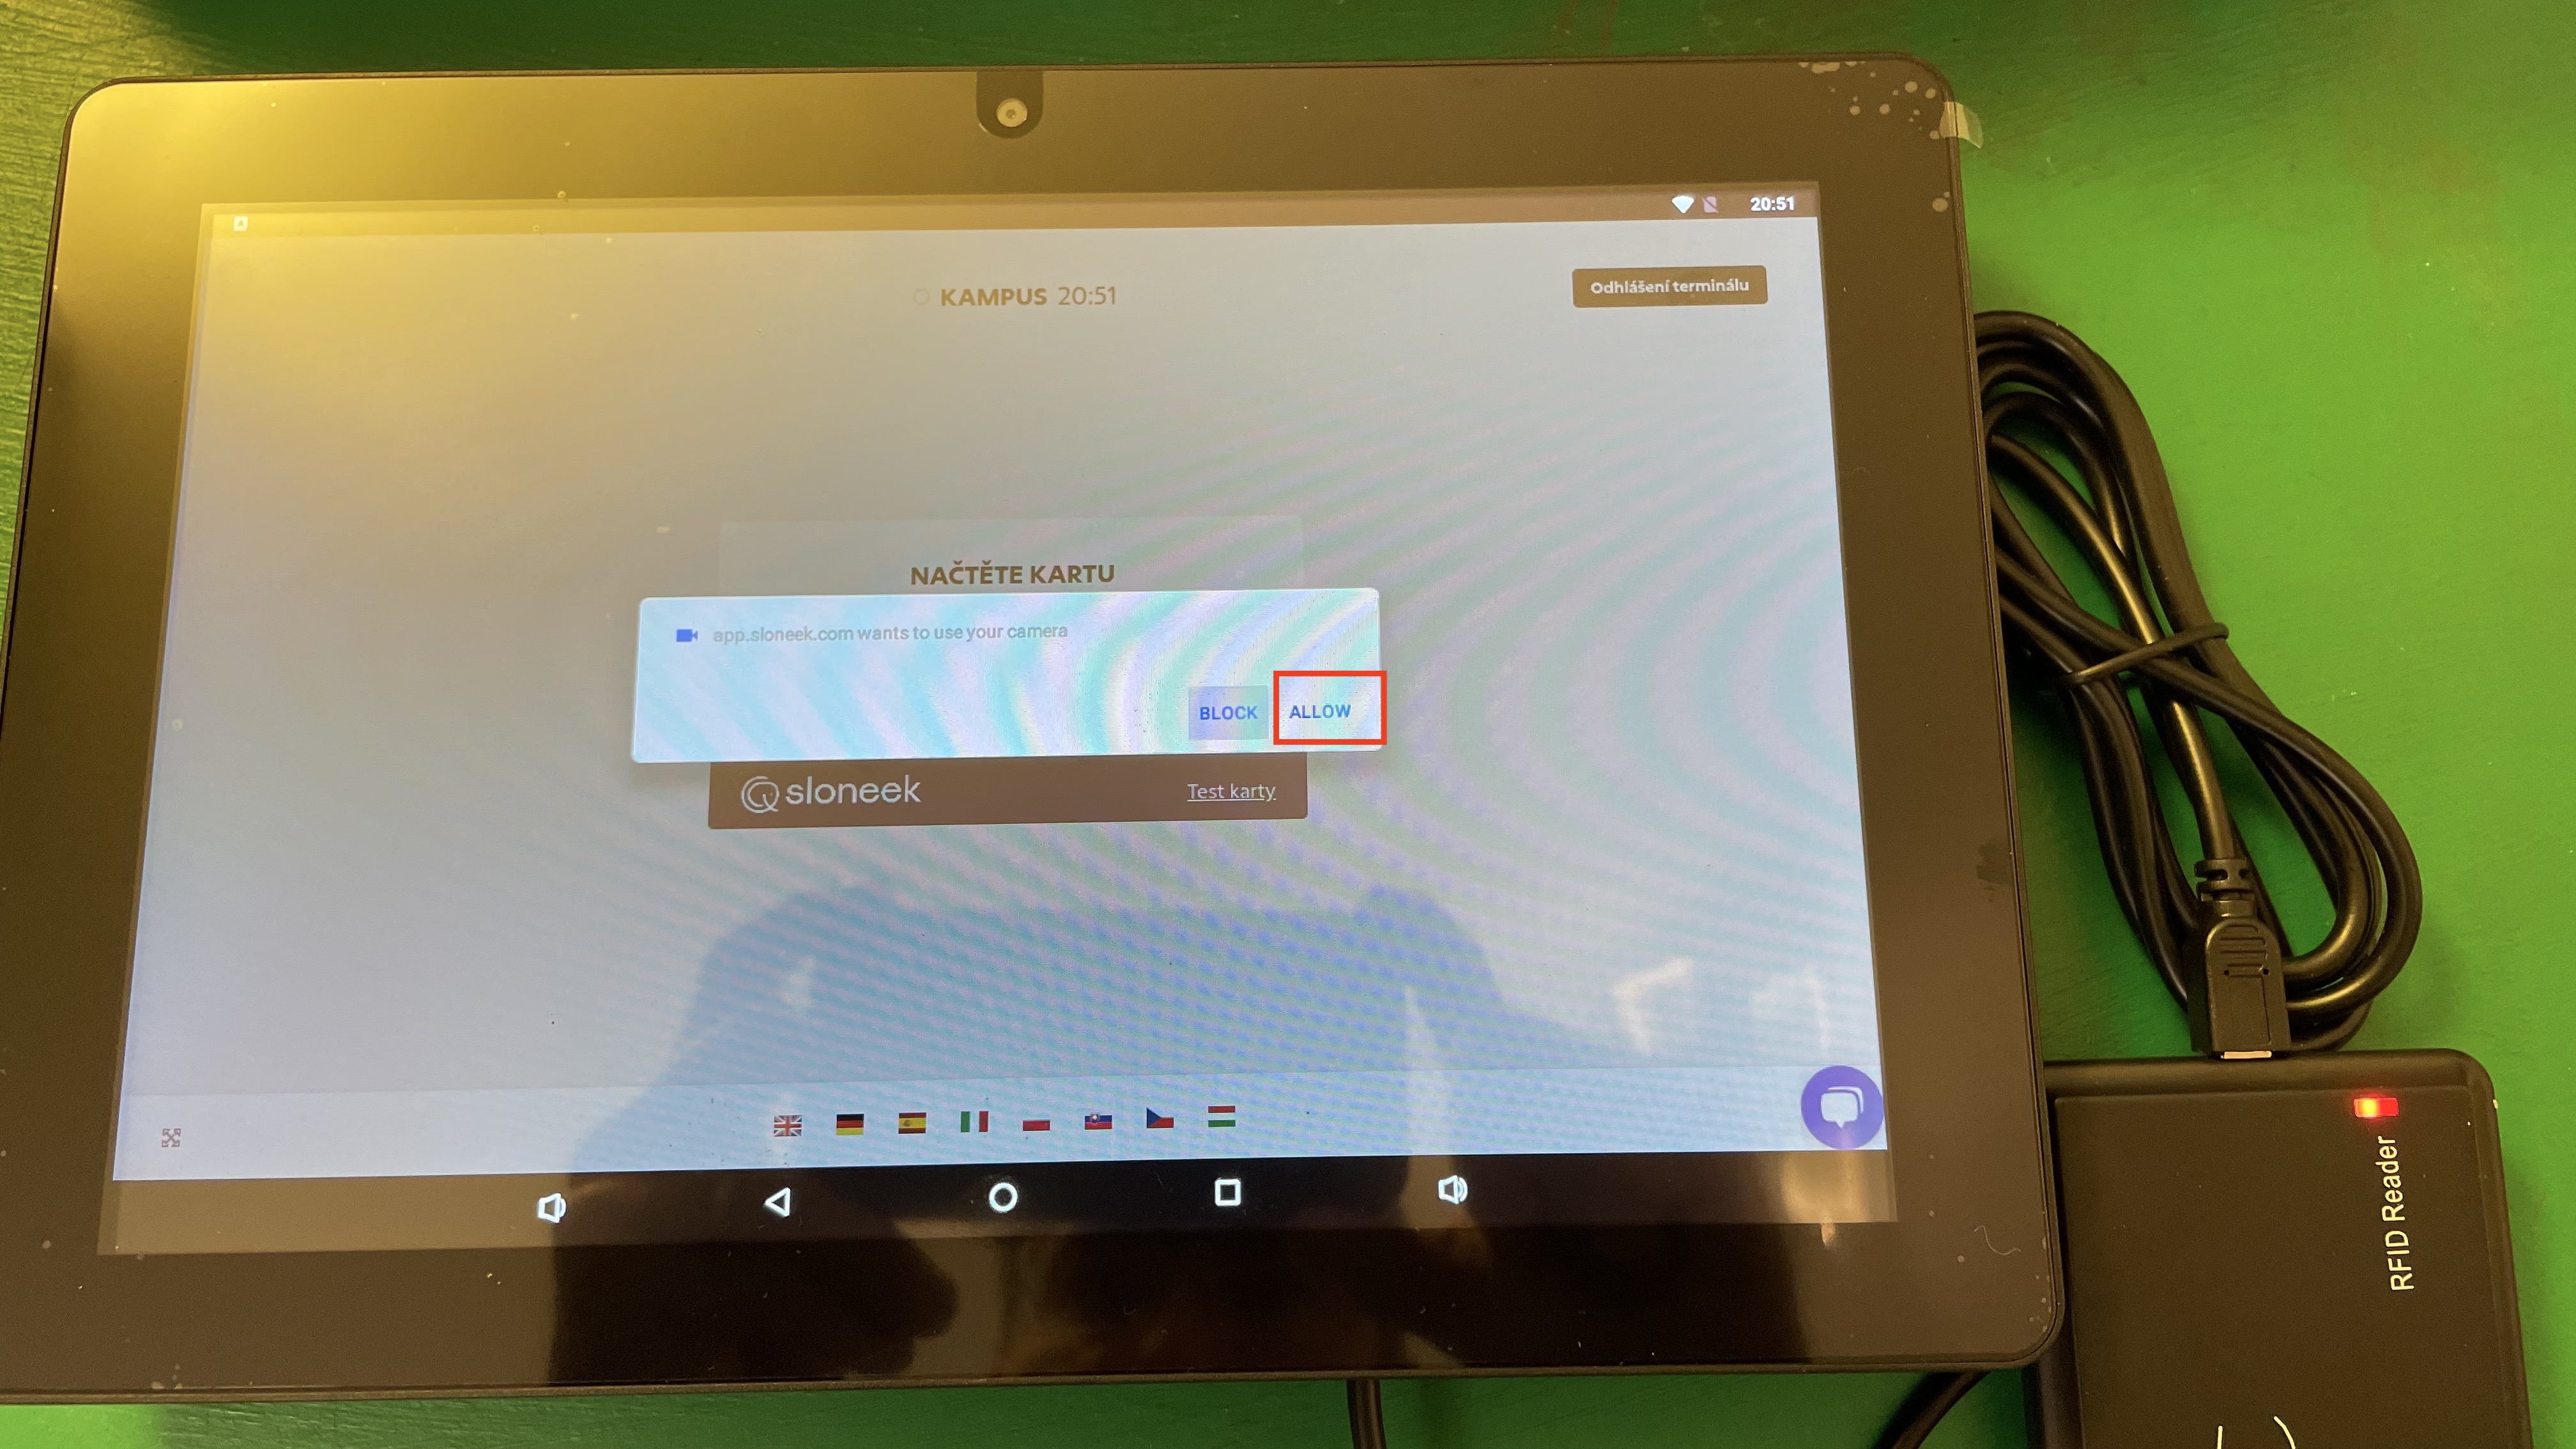
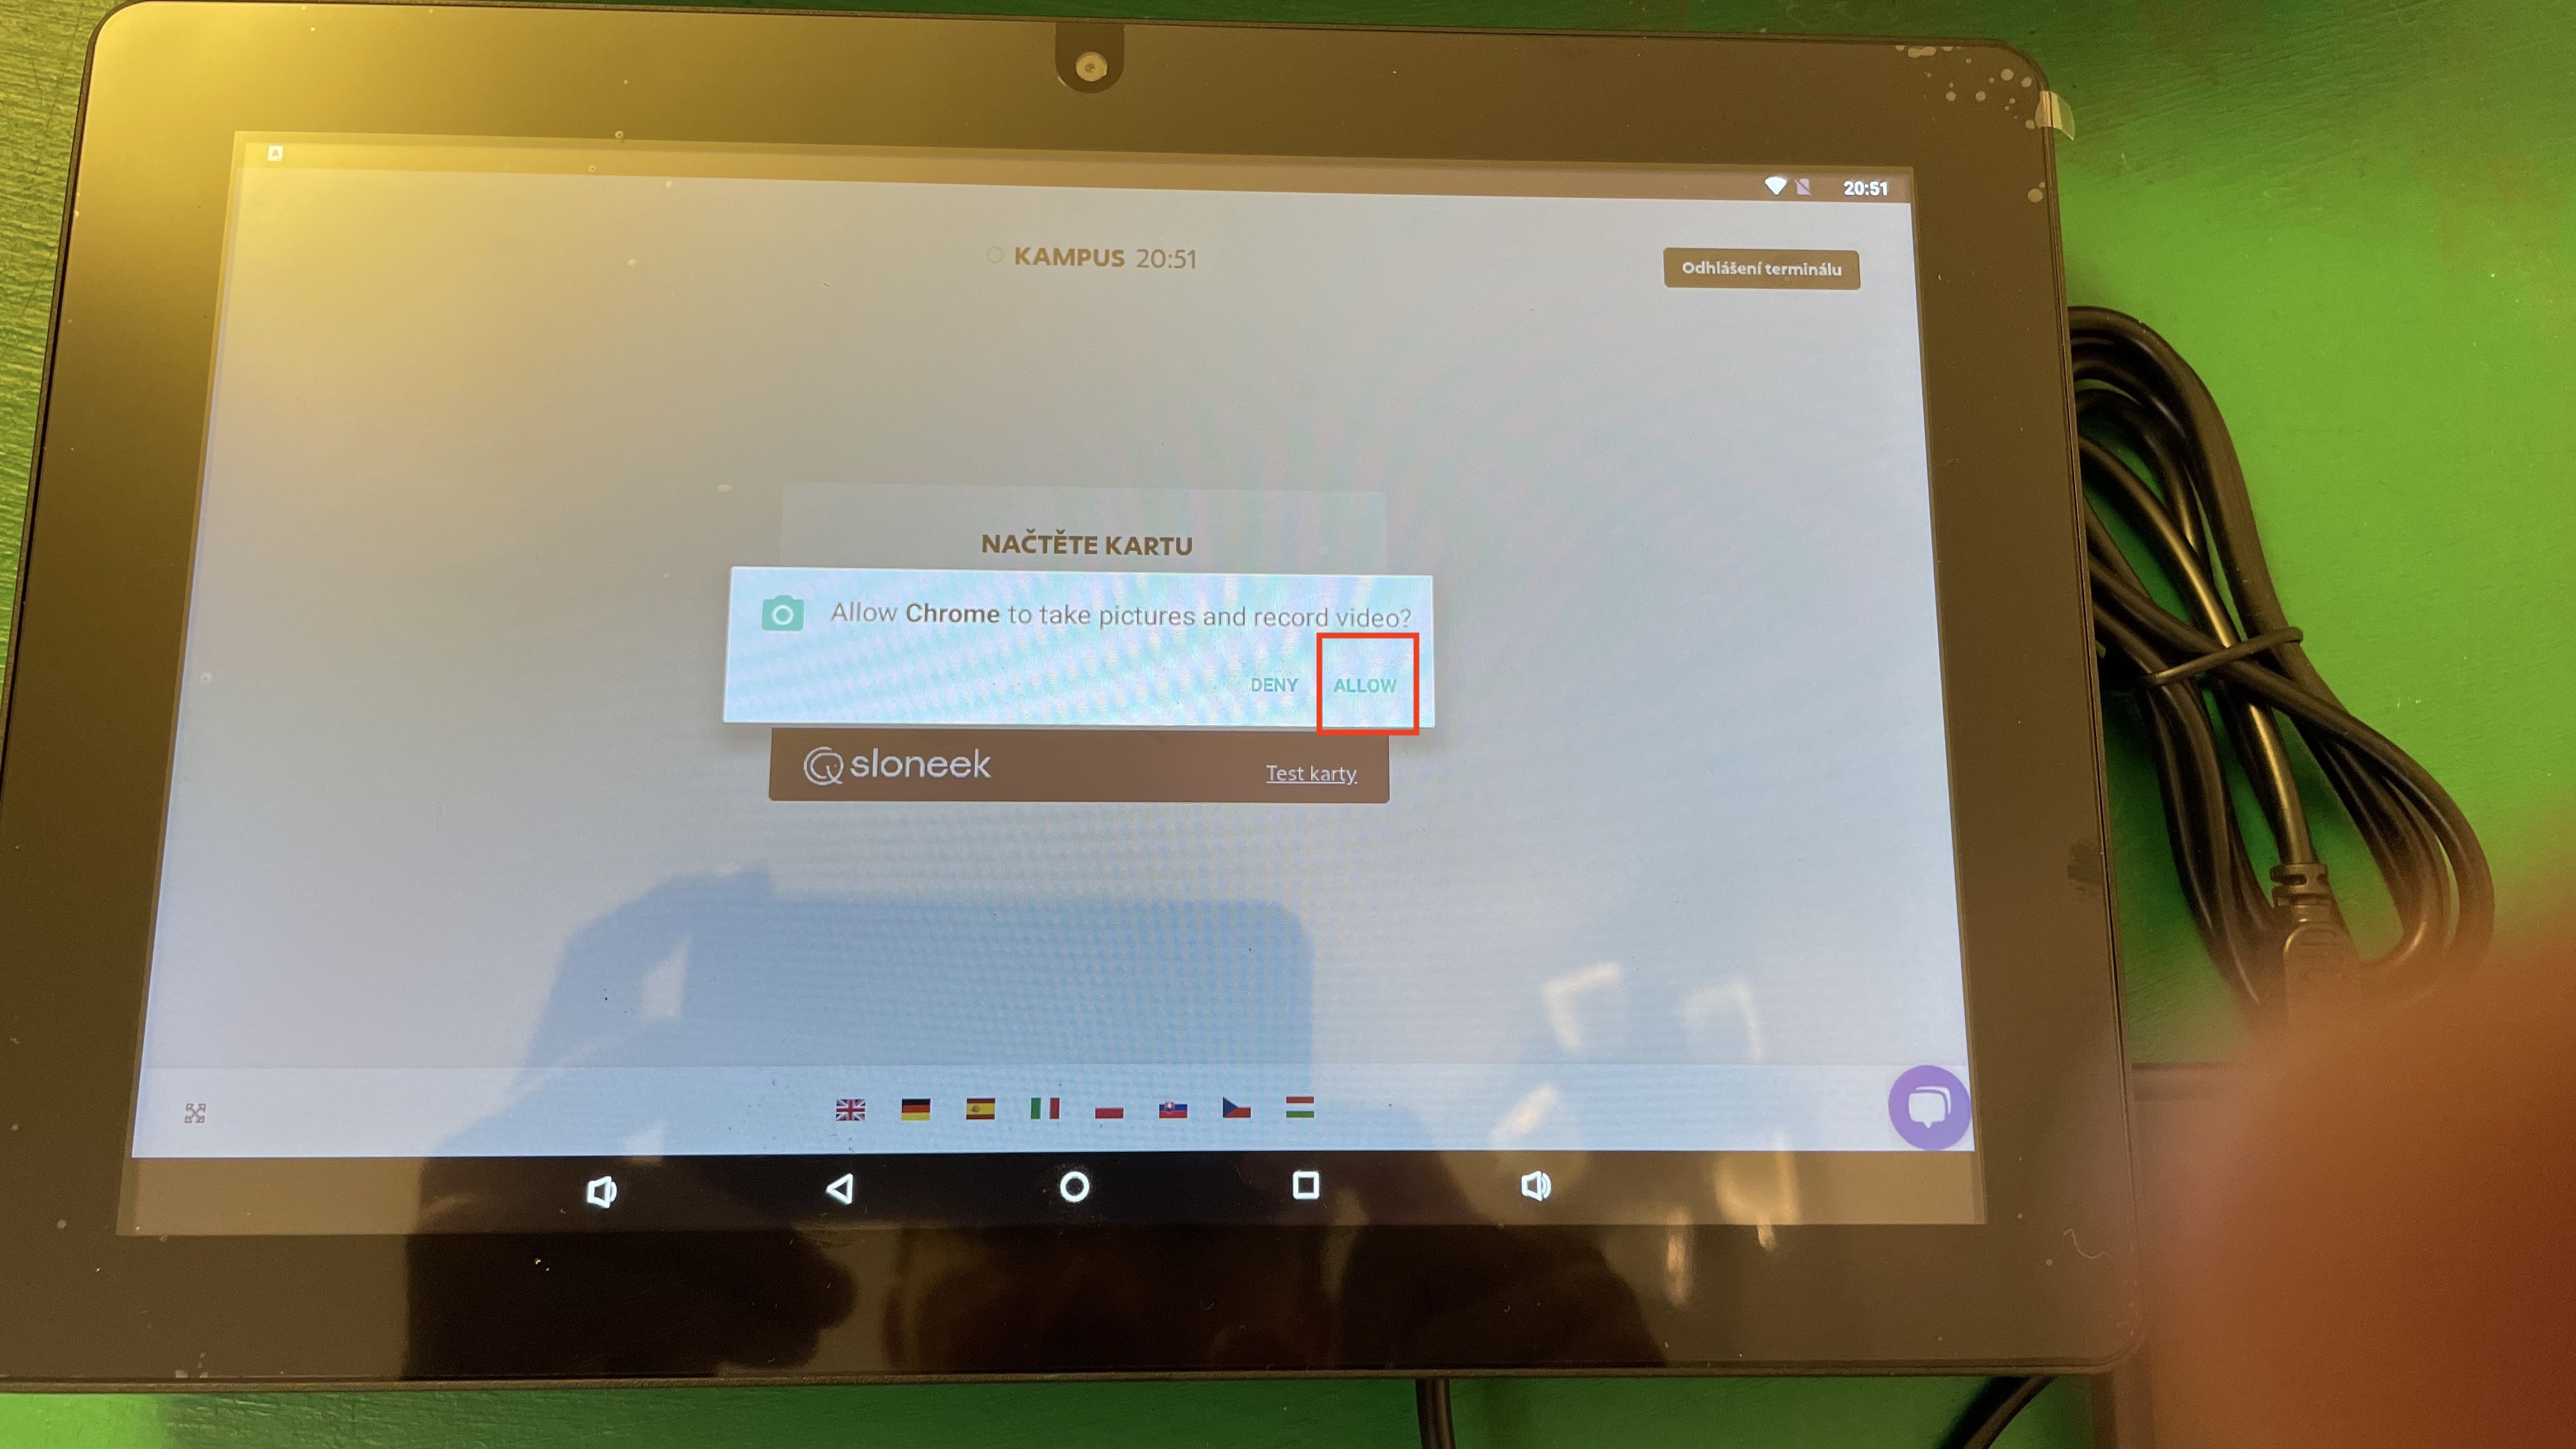
If we want to take photos of employees as they arrive and leave the workplace, we must allow this option:
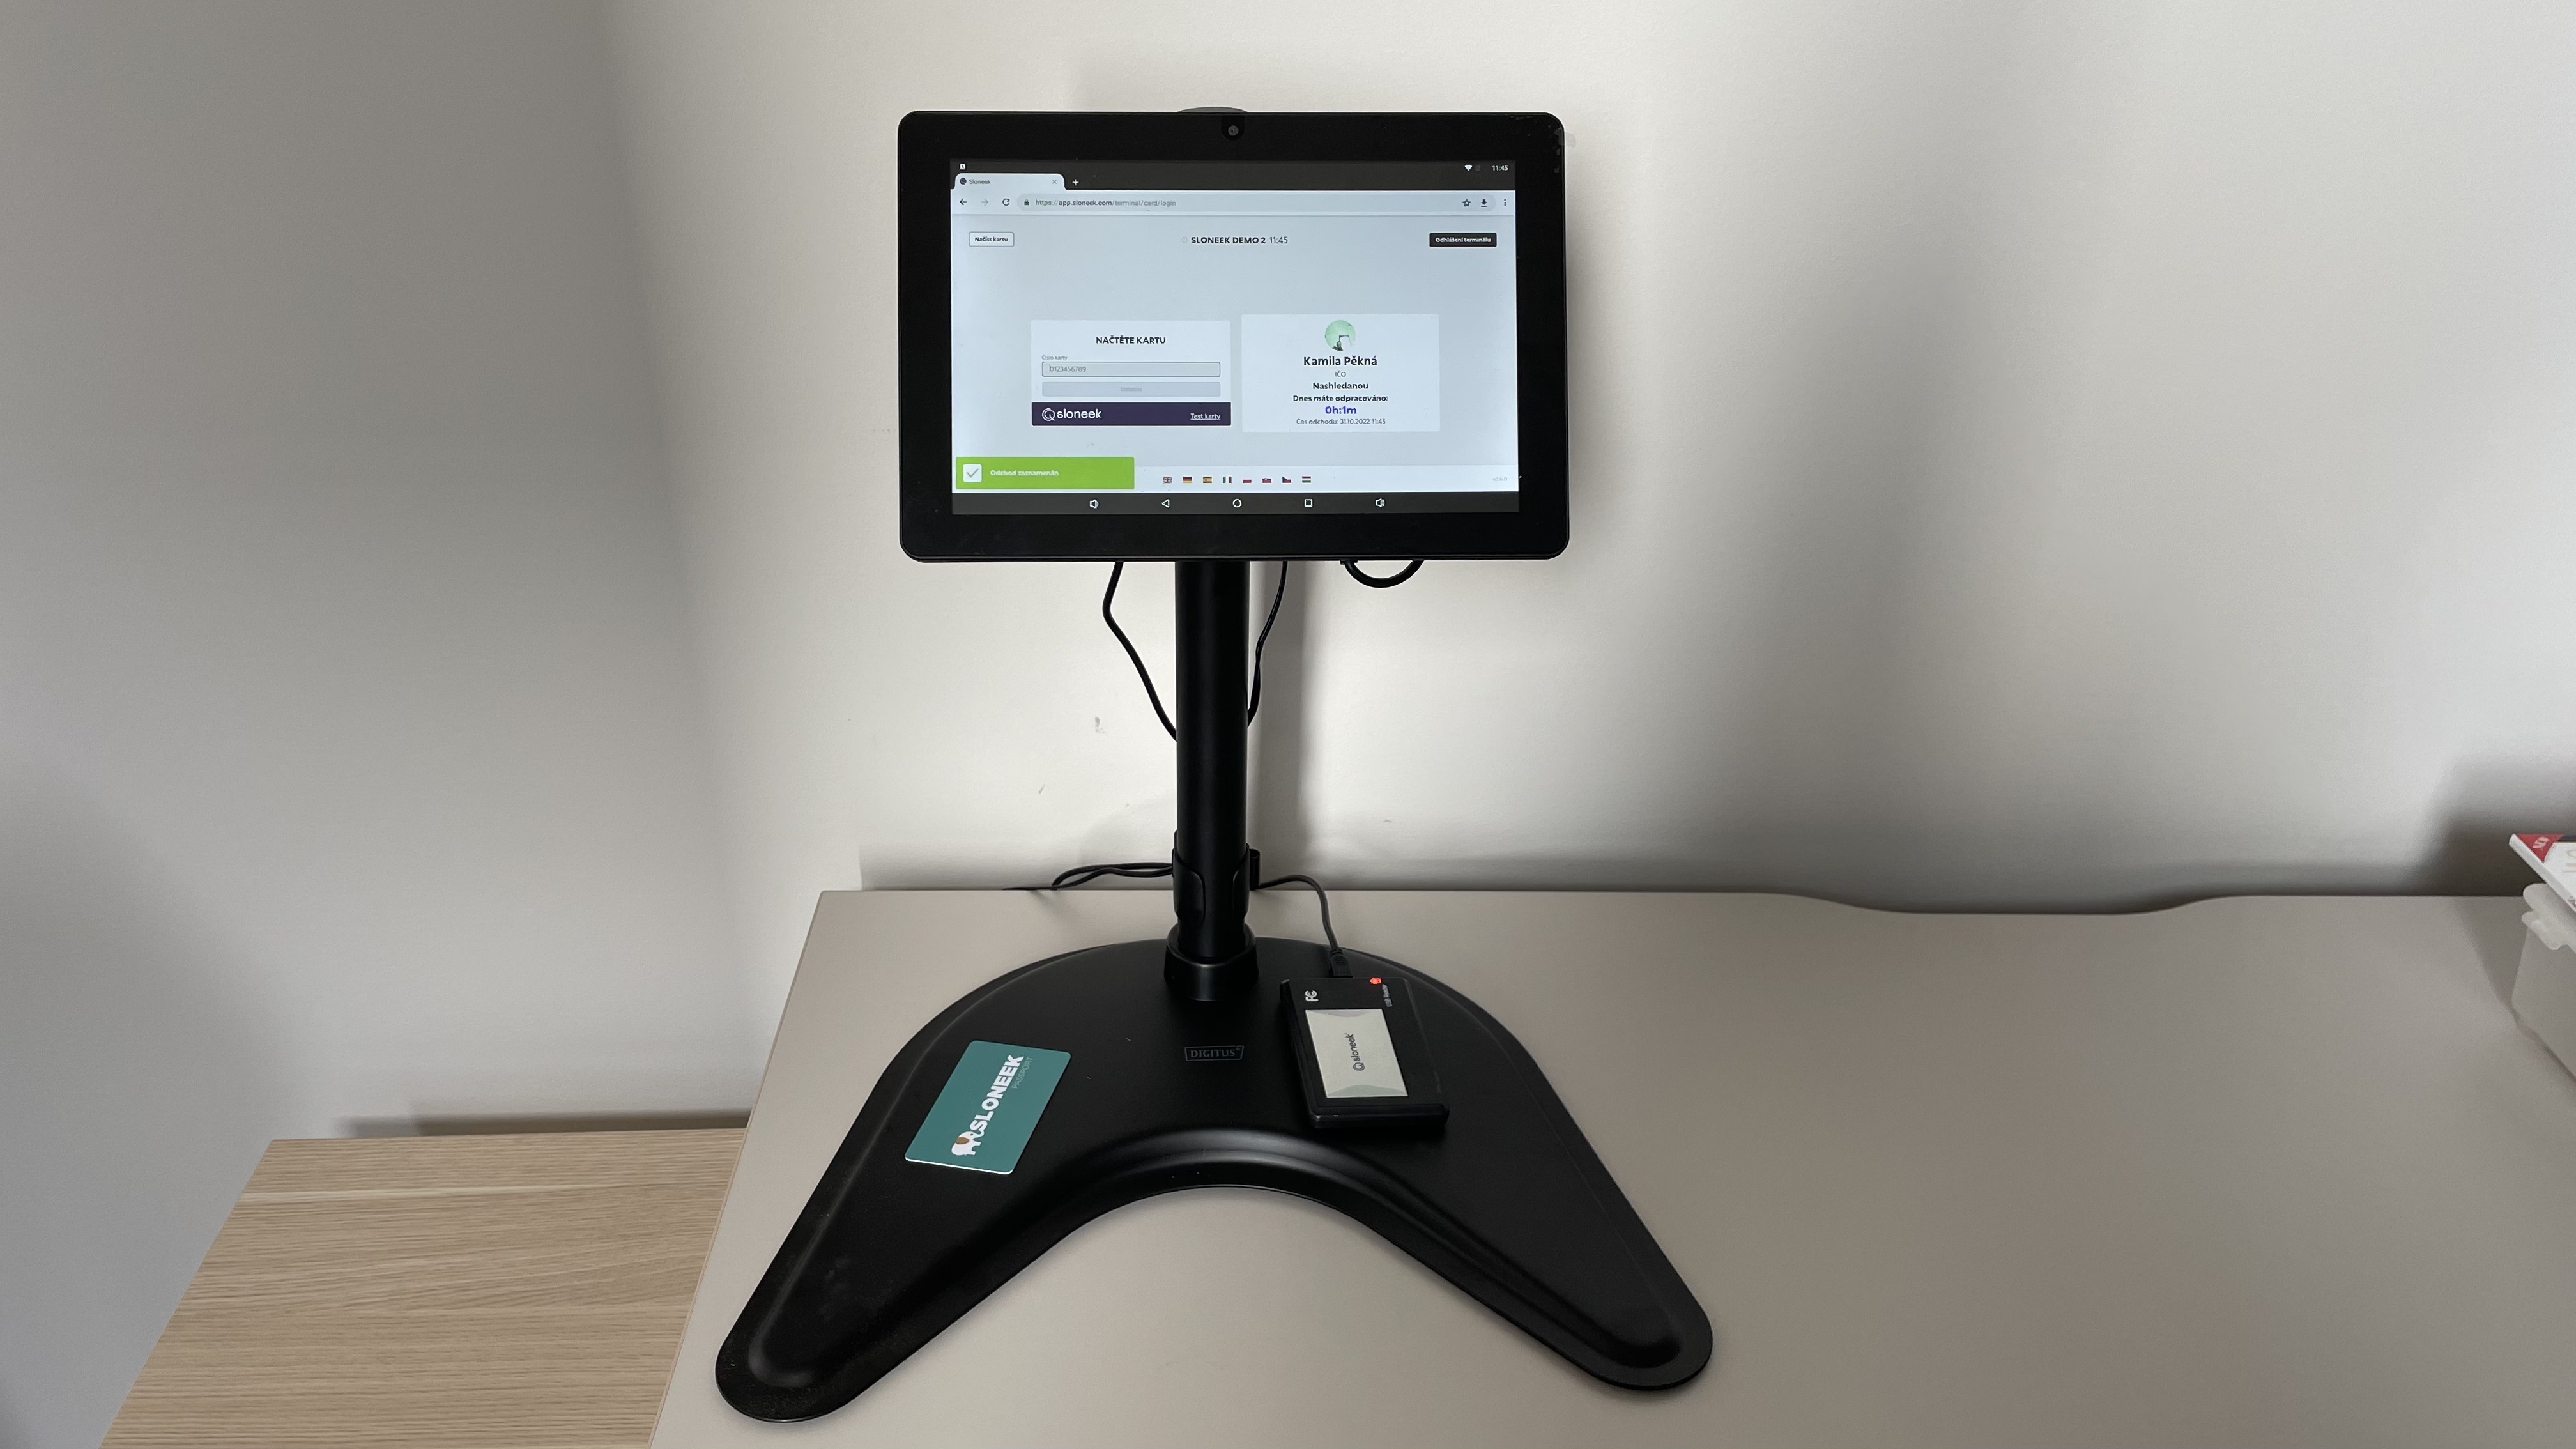
Finally, a demonstration of the terminal on a VESA stand:
We wish you successful use and if you have any problems, please contact our team. 🙂
0 comments
Please sign in to leave a comment.