All integrations
-
API Documentation
The Sloneek app has its own public API documentation (specification). If you need any further information, please contact us. -
Synchronisation with Outlook
Link calendar events to your Microsoft account with Absence in Sloneek.
 Under your Avatar, click on Profile and select the Interface settings tab. Log in to your account.
 Enable the Outlook calendar entry option. Then just select the calendars you want to sync.
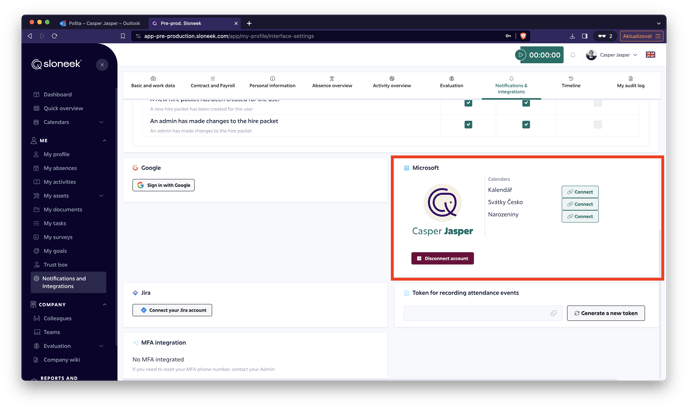
Only events that are logged into the application AFTER Microsoft and Sloneek are connected will be logged.
Only APPROVED events will be written to the calendars.
The login email to Sloneek and Microsoft account must match.Please also note that only absence events are entered into Google Calendar, not activities (e.g. business trips or homeoffice).
-
Integration with JIRA
Sloneek is integrated with JIRA to transfer activities via timetracking.
Connection to JIRA account
Scope of integration
Connection to JIRA account
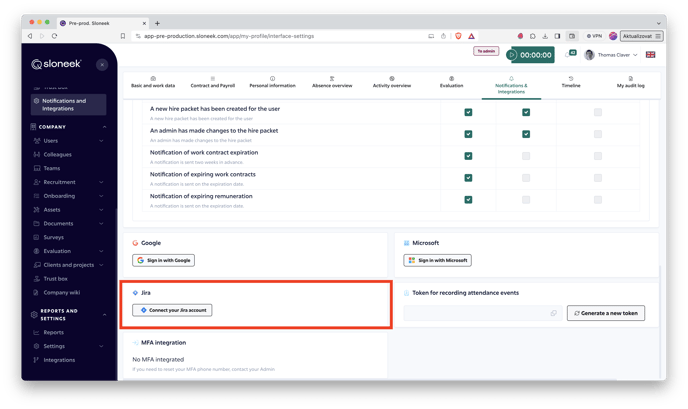
Under My Profile, go to the Notifications and Integrations tab. Then click on the Connect your Jira account button.
ATTENTION: The emails used to log into Sloneeka and JIRA must be identical.
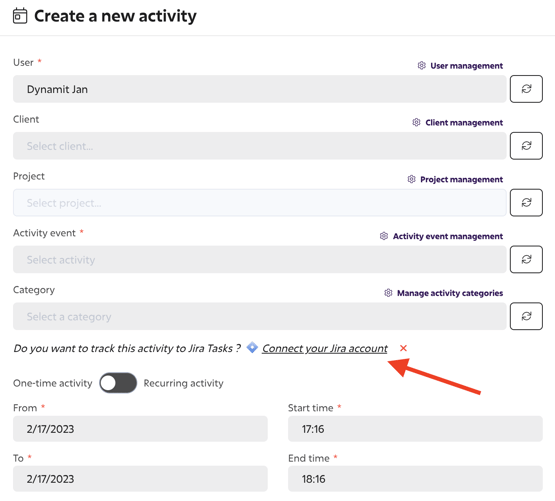
You can also connect a JIRA account directly from the window when creating a new time tracking activity:
Scope of integration
 When setting up time tracking activities, you select directly from the tasks in your JIRA account. After creating an activity, you can click on the task in your JIRA account directly from the activity detail.
 When approving activities, the manager is able to view the specific task in JIRA directly from Sloneek.
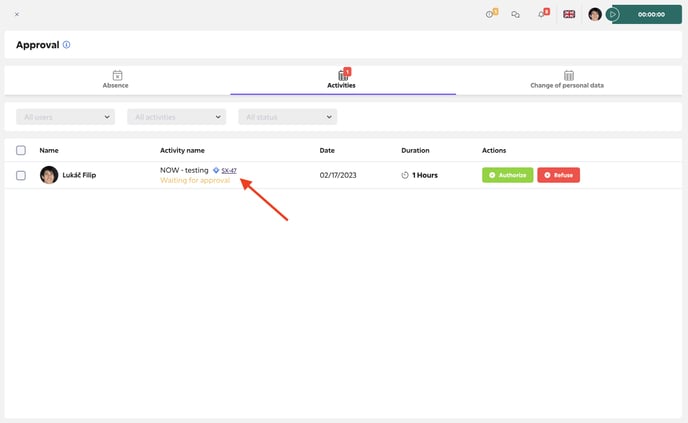 The approved time tracking activity is automatically written to the Work log of the task in JIRA.
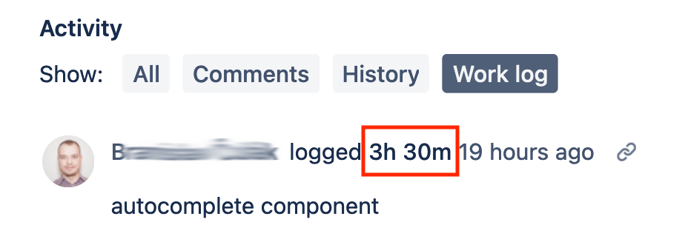
If you delete an approved activity in Sloneek, it will also be deleted in the JIRA task.
The activity event report contains a click-through directly to the task in JIRA.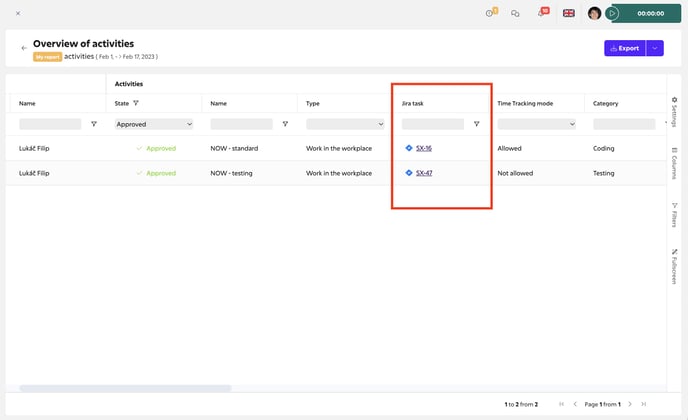
-
IceWarp integration
If you use the Ice WARP system you have the possibility to transfer absence events from Sloneek to Ice Warp calendars.
Ask support to adjust your account settings individually. As part of this customization, you will receive a URL address (sample: vasefirma.icewarp.cz) and then paste it into Sloneek under Settings / Other / Integration.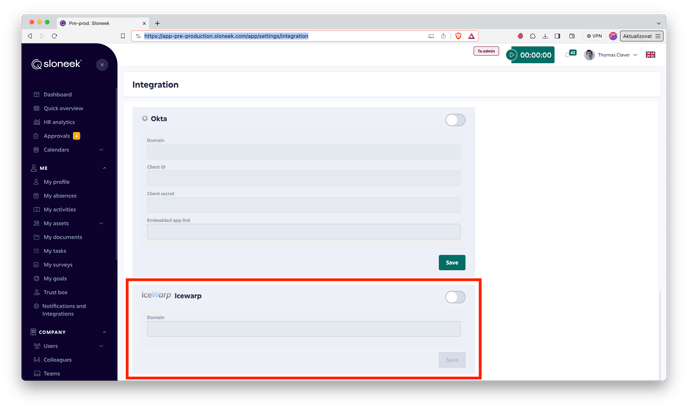
-
Sync with Google Calendar
Link calendar events with Absence in Sloneek to your Google account by:
in the menu, click on My Profile and select the Interface settings tab. Log in to your account.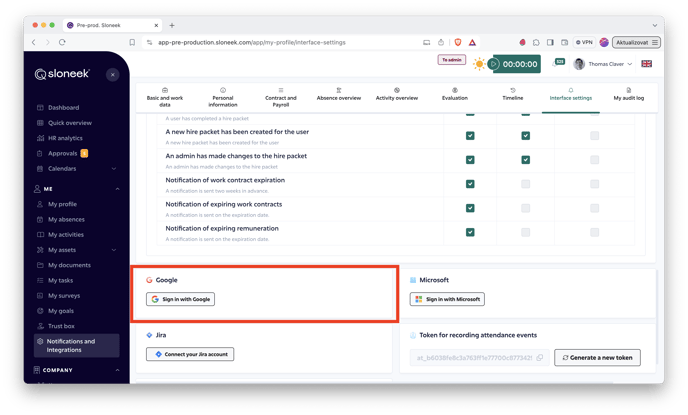 enable the Google Calendar option. Then just select the calendars you want to sync.
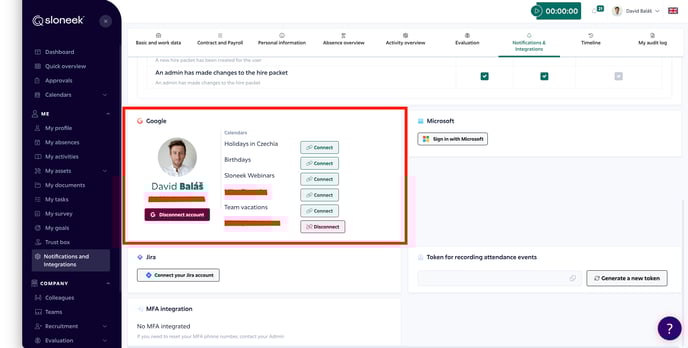
Only absence events that are logged into the app AFTER Google and Sloneek are connected will be logged.
Only APPROVED absence events of type Free time will be written to the calendars. They will be automatically set as an Out of office type of event in Google Calendar with subsequent formalities.
The login email for Sloneek and Google account must match.ATTENTION! If the user has set "READ ONLY" rights for the shared corporate calendar in the settings of the corporate Google account, there will NOT be a transfer of events for the SLONEEK to the connected GOOGLE CALENDAR.
Please also note that only absence events are entered into Google Calendar, not activities (e.g. business trips or homeoffice).
-
MFA (Multi-factor verification)
MFA adds another layer of security to user accounts by requiring multiple forms of identification.
💎 MFA is only available for the Enterprise package.
MFA Setup
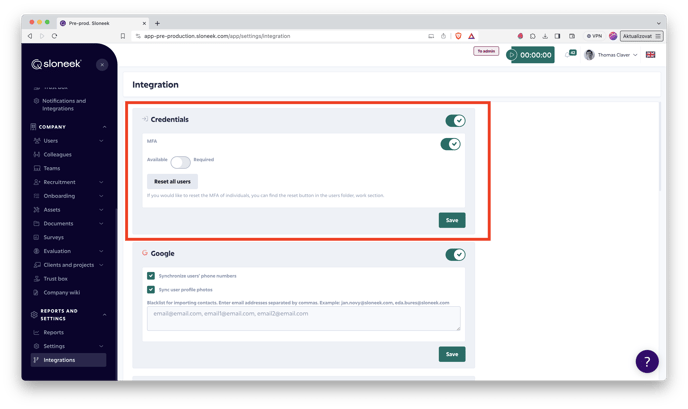
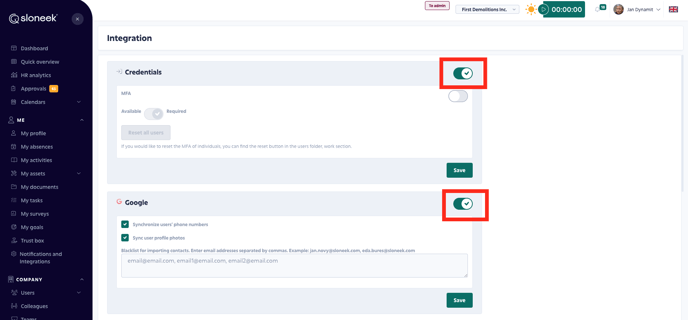
The company account owner (not an administrator) can set up MFA from the Integration / Credentials section.
You can choose between two options:
- Available MFA, where all users can choose whether they want to use multi-factor authentication at login.
- Requeired MFA, where all users must use multi-factor authentication when logging into their account.
Login procedure
The MFA itself involves two factors in Sloneek:
- The thing the user knows well (their application password)
- The means of authentication (phone to send the verification SMS)
The moment a user with MFA activated logs in to the app for the first time (from the moment MFA is activated), they will enter their phone number to receive a verification SMS:
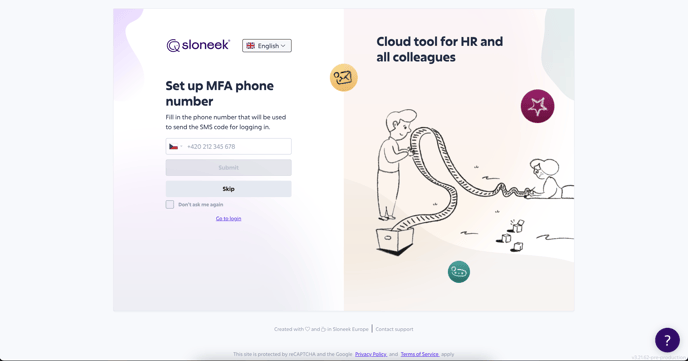
The code is then simply entered into the prepared field and securely logged into the application:
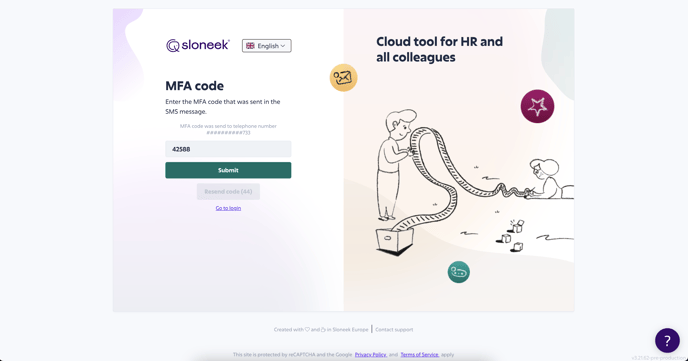
You do not need to enter your phone number again the next time you log in. The code will automatically be sent to the user's phone number.
Reset MFA
If needed, the account owner can reset the MFA at any time for:
- a selected user (in their folder under Notifications & Integrations / MFA)
- all users (in Settings / Integration / Credentials by clicking on the Reset button)
Security measures
Each user has 5 login attempts to correctly enter the SMS code. Once the limit is exceeded, his account will be locked. Recovery is done by allowing the account owner to reset the user's MFA, allowing them to log in again.
The MFA feature is also available for logging in from the mobile app. At the same time, account administrators do not see the phone numbers users enter to have codes sent to them.
-
Integration with OKTA
Use your Okta account to log in to Sloneek app.
If your company uses the OKTA system, you can use the SSO (Single Sign On) login credentials from this system to log into Sloneek.
You can set up the integration in Reports and settings / Integration.
If you want OKTA login to be the only option for logging in, the other login methods must be disabled.
/off.gif?width=66&height=50&name=off.gif)
-
Google Workspace Integration with Sloneek
Overview
The Google Workspace integration allows companies to enable secure login to Sloneek through Google accounts, import users in bulk from selected Google Groups, and synchronize approved absences with Google Calendar.
The integration covers:
- Single Sign-On through Google
- Switching to SSO-only login
- User import from Google Workspace
- Synchronization of basic user data
- Synchronization of approved absences to Google Calendar
1. Google SSO Login
Single Sign-On allows users to log in to Sloneek using their Google Workspace account. The setup is simple and can usually be completed within a few minutes.
Requirements
The person setting up the integration must meet the following requirements:
- They have administrator permissions in Google Workspace.
- They have a Sloneek account with the Administrator or Account Owner role.
- The email address of their Sloneek account exactly matches the email address used in Google Workspace.
Pay special attention to possible differences between primary email addresses, aliases, or other account identifiers in Google Workspace.
Activation Steps
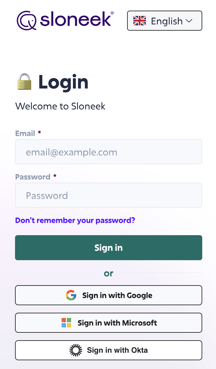
- The administrator goes to the Sloneek login page.
- They select Sign in with Google.
- During login, they grant the required permissions for the organization.
- Sloneek is connected with the Google Workspace environment.
- From this point, users can log in to Sloneek using their Google Workspace account.
2. Switching to SSO-Only Login
After successful testing, we recommend disabling standard email and password login for security reasons and keeping only Google SSO enabled.
Recommended Process
1. Verify Email Addresses
Check that users’ email addresses in Sloneek exactly match their Google Workspace accounts.
2. Run a Pilot Test
First, test Google login with the administrator and a small group of users.
3. Inform Users
Notify employees in advance about the date from which login will only be possible through their Google account.
4. Switch the Login Mode
In Sloneek, go to Integrations and disable standard login. Keep only Google SSO active.
5. Verify Functionality
After switching, check that both the administrator and regular users can log in through Google without issues.
3. Risks and Rollback
Possible Risks
The following situations may occur when switching to Google SSO:
- Email addresses in Sloneek and Google Workspace do not match.
- Google, as the identity provider, experiences an outage.
- The user does not have the correct account or permissions in Google Workspace.
- The user is trying to log in with an alias or a different email address than the one stored in Sloneek.
Rollback
If an issue occurs, the administrator can re-enable standard login with email and password in Sloneek.
If the administrator cannot access Sloneek due to an SSO issue, Sloneek Support can help restore alternative access.
Changing the login type has no impact on the licensing model or SLA.
4. User Import from Google Workspace
The integration allows administrators to create users in Sloneek in bulk based on Google Groups managed in Google Admin Console.
Synchronization Direction
Synchronization is one-way only:
Google Workspace → Sloneek
Automated Provisioning
Sloneek does not use fully automated provisioning in this scenario. This means Google does not automatically:
- create users in Sloneek,
- send HR data in the background,
- update user profiles automatically without administrator action.
The import is always started manually by an administrator in Sloneek.
Preparing Groups in Google Admin Console
For easier user management, we recommend creating dedicated Google Groups in Google Admin Console.
Recommended Steps
- Open Google Admin Console.
- Go to Directory → Groups.
- Click Create group.
- Enter the group name, for example:
- Sloneek – Active employees
- Sloneek – Contractors
- Sloneek – Prague
- Set the group email address, for example:
- Add group members, meaning the employees who should be imported into Sloneek.
- Save the group.
Google Groups created through Admin Console are easier to manage centrally and can also be used for access management and service settings within Google Workspace.
Where to Start the Import in Sloneek
In Sloneek, go to:
Users → Management → Import users
During the import, the administrator:
- selects specific Google Groups,
- chooses which users to import,
- decides whether users from the selected group should be activated immediately.
Recommended Group Structure
For clear user management, we recommend creating groups based on employment status, location, or user type, for example:
Group name Example use Sloneek – Active employees Current internal employees Sloneek – Contractors External workers or contractors Sloneek – Prague Employees in a specific office or location This makes it easier to control which users should be imported into Sloneek and how they should be activated.
5. Transferred Data
To read data from Google Workspace, Sloneek requires the necessary permissions to access selected user information from the organization’s directory.
The following data can be synchronized to Sloneek:
Attribute Description First name User’s first name Last name User’s last name Email address Main user identifier Mobile phone User’s phone number Business phone Company phone number Profile photo User’s photo from their Google profile To synchronize a wider set of HR data, such as department, manager, or location, this must be handled individually through the API.
6. Synchronizing Absences to Google Calendar
Sloneek also allows approved absences to be written directly to the user’s personal Google Calendar.
Each user enables this feature individually.
Activation Steps
The user goes to:
My Profile → Notifications and Integrations
Then they:
- connect their account with Google Calendar,
- select the target calendar,
- save the settings.
From that moment, all newly created and approved absences are automatically added as events to the user’s work calendar.
Recommended Deployment Process
Before launching the integration fully, we recommend:
- checking that email addresses match in Sloneek and Google Workspace,
- activating and testing Google SSO with a small group of users,
- informing employees about the login method change,
- switching to SSO-only mode after a successful test,
- preparing Google Groups in Google Admin Console,
- importing users from selected Google Groups into Sloneek,
- optionally recommending that users connect Sloneek with Google Calendar for absence synchronization.
Summary
The Google Workspace integration with Sloneek enables secure login through Google SSO, manual user import from selected Google Groups, one-way synchronization of basic user data, and synchronization of approved absences to Google Calendar.
For a smooth rollout, it is important to verify matching email addresses, test SSO with a smaller group of users, prepare the required Google Groups in Google Admin Console, and only then switch to strict SSO-only login.
-
Microsoft Entra ID Integration with Sloneek
Overview
The Microsoft Entra ID integration, formerly Azure AD, allows companies to enable secure login to Sloneek through Microsoft accounts, import users in bulk from selected groups, and synchronize approved absences with Outlook calendars.
The integration covers:
- Single Sign-On through Microsoft
- Switching to SSO-only login
- User import from Microsoft Entra ID
- Synchronization of basic user data
- Synchronization of approved absences to Outlook calendar
1. Microsoft SSO Login
Single Sign-On allows users to log in to Sloneek using their Microsoft account. The setup is simple and can usually be completed within a few minutes.
Requirements
The person setting up the integration must meet the following requirements:
- They have the Global Administrator or User Administrator role in the Microsoft tenant.
- They have a Sloneek account with the Administrator or Account Owner role.
- The email address of their Sloneek account exactly matches the email address used in Microsoft.
Pay special attention to possible differences between the email address and the UPN address in Microsoft.
Activation Steps
- The administrator goes to the Sloneek login page.
- They select Sign in with Microsoft.
- During login, they grant Admin consent for the entire organization.
- Sloneek is automatically added to the Microsoft environment under:
- Azure Portal
- Enterprise Applications
- From this point, the integration and access can be managed centrally in Microsoft.
- Other users can then log in through Microsoft without the need for individual approval.
2. Switching to SSO-Only Login
After successful testing, we recommend disabling standard email and password login for security reasons and keeping only Microsoft SSO enabled.
Recommended Process
1. Verify Email Addresses
Check that users’ email addresses in Sloneek exactly match their accounts in Microsoft Entra ID.
2. Run a Pilot Test
First, test Microsoft login with the administrator and a small group of users.
3. Inform Users
Notify employees in advance about the date from which login will only be possible through their Microsoft account.
4. Switch the Login Mode
In Sloneek, go to Integrations and disable standard login. Keep only Microsoft SSO active.
5. Verify Functionality
After switching, check that both the administrator and regular users can log in through Microsoft without issues.
3. Risks and Rollback
Possible Risks
The following situations may occur when switching to Microsoft SSO:
- Email addresses in Sloneek and Microsoft Entra ID do not match.
- Microsoft, as the identity provider, experiences an outage.
- The user does not have the correct permissions set in the Microsoft tenant.
Rollback
If an issue occurs, the administrator can re-enable standard login with email and password in Sloneek.
If the administrator cannot access Sloneek due to an SSO issue, Sloneek Support can help restore alternative access.
Changing the login type has no impact on the licensing model or SLA.
4. User Import from Microsoft Entra ID
The integration allows administrators to create users in Sloneek in bulk based on security groups in Microsoft Entra ID.
Synchronization Direction
Synchronization is one-way only:
Microsoft Entra ID → Sloneek
Automated Provisioning
Sloneek does not use fully automated provisioning in this scenario. This means Microsoft does not automatically:
- create users in Sloneek,
- send HR data in the background,
- update user profiles automatically without administrator action.
The import is always started manually by an administrator in Sloneek.
Where to Start the Import
In Sloneek, go to:
Users → Management → Import users
During the import, the administrator:
- selects specific groups from Entra ID,
- chooses which users to import,
- decides whether the users should be activated immediately.
Recommended Preparation in Entra ID
For easier management, we recommend creating a dedicated security group in Microsoft Entra admin center, for example:
Sloneek – Active employees
Group membership can be managed as:
- Assigned – manual membership management,
- Dynamic User – dynamic membership based on rules.
The administrator can then simply select this group during the import to Sloneek.
5. Transferred Data
To read data from Microsoft Entra ID, the integration requires the following permissions:
- Directory.Read.All
- User.Read.All
The following data is synchronized to Sloneek:
Attribute Description First name User’s first name Last name User’s last name Email address Main user identifier Mobile phone User’s phone number Business phone Company phone number Profile photo User’s photo from their Microsoft profile To synchronize a wider set of HR data, such as department, manager, or location, this must be handled individually through the API.
6. Synchronizing Absences to Outlook Calendar
Sloneek also allows approved absences to be written directly to the user’s personal Outlook calendar.
Each user enables this feature individually.
Activation Steps
The user goes to:
My Profile → Notifications and Integrations
Then they:
- connect their account with Outlook,
- select the target calendar,
- save the settings.
From that moment, all newly created and approved absences are automatically added as events to the user’s work calendar.
Recommended Deployment Process
Before launching the integration fully, we recommend:
- checking that email addresses match in Sloneek and Microsoft Entra ID,
- activating and testing Microsoft SSO with a small group of users,
- informing employees about the login method change,
- switching to SSO-only mode after a successful test,
- preparing a security group in Entra ID for user import,
- importing users into Sloneek,
- optionally recommending that users connect Sloneek with their Outlook calendar for absence synchronization.
Summary
The Microsoft Entra ID integration with Sloneek enables secure login through Microsoft SSO, manual user import from selected Entra ID groups, one-way synchronization of basic user data, and synchronization of approved absences to Outlook calendar.
For a smooth rollout, it is important to verify matching email addresses, test SSO with a smaller group of users, and only then switch to strict SSO-only login.