What the Administrator needs to know
-
Clients and projects: how to set everything up correctly?
Do you work for different clients and on different projects? See how to keep everything neatly recorded.👇Content:
Set up clients Assign work activities to users Reporting Set up projects How to record everything as a user Project manager role Creating clients and pairing them to users
It all starts in the Company / Clients and projects section, where you define your own clients (customers) that you work for. For each client, you have the option to specify a few basic and additional parameters that you need to record. If you still miss some data, you can easily add it to the client by creating a custom field.
The key is then to assign the users who work for the client from the list to the client you created: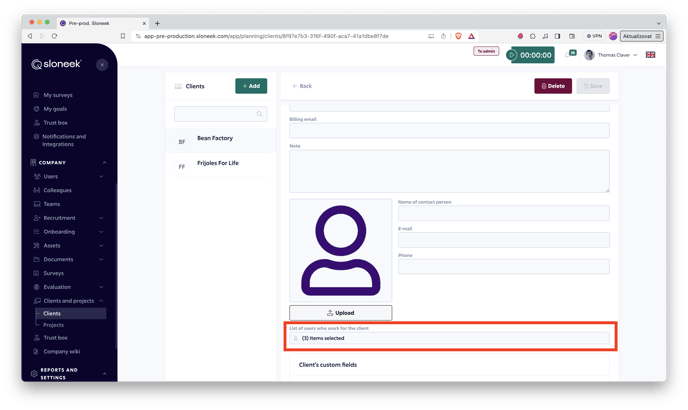
Creating projects and pairing them to clients
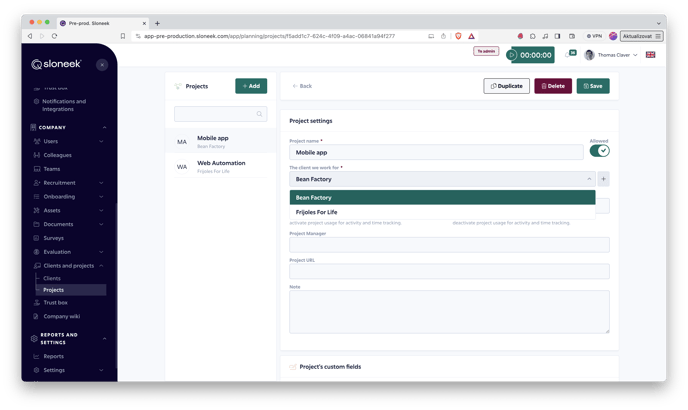
In the next step, you can create individual projects that you process for clients. You can find this option in the Company / Clients and projects section. Again, you can provide each project with the necessary information, the important thing being to pair the project to a specific client:
Project manager role
Each project can be assigned one or more Project Managers. You assign this role to a user in the project details.
A Project Manager has permission to see all activities related to a specific project (reported to the project). He can approve the reported activities. If they are not approved, they will not be entered into the reports. Approval is done in the same way as for team managers in the Approval menu tab.The Project Manager does not have different permissions than the Team Manager. He can only approve activities reported in projects in which he is marked as Project Manager.
Assign work activities to users
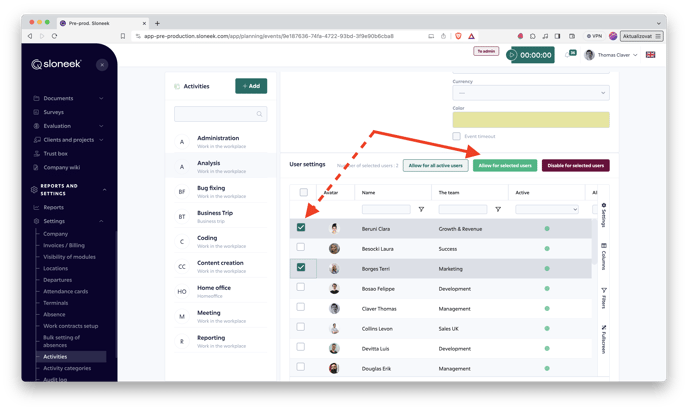
Once you have created clients and projects, all you have to do is create specific work activities (e.g. programming) and allow selected users to record them. In the Settings / Activities section, you can create a variety of different work activities, including their detailed descriptions. Once you have saved the new activity, you can enable it below the page for the selected users to see it in the menu:
Activity categories
If you would like to go one step further, you can sort all work activities into logical categories to further refine your reports. For example, the activity Creating mock-ups and the activity Banners can be grouped into the category Web graphics. You can create your own categories in the Settings / Activity categories section.
How to record everything from the user's perspective?
Now let`s have a look at the crucial part, i.e. recording the specific work activity that the user has performed within the project for one of the clients. Everything is very easy:
- The user clicks on the New Activity button from their desktop or calendar.
- A dialog box opens, in which the user first select which client they did the work for.
- Depending on this, they will only see the projects that are related to the client.
- Then the user selects which activity they have performed (e.g. mock-ups) or add the activity category.
- All that remains is to enter the time range and save.
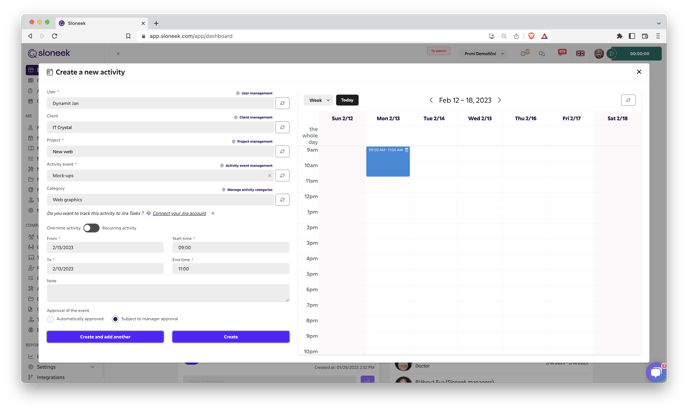
If a client has at least one active project paired to it and the user selects the client from the menu when inserting a new activity, then entering the project is a required field. If there is no active project paired to the client, there is no need to select a project.
Reporting for clients and projects
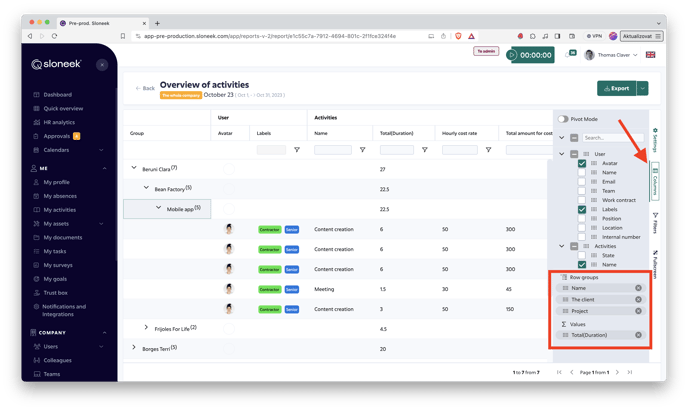
Summaries of all recorded activities and work for your clients are at your fingertips at any time. Simply go to the Reports & Exports section and open the Overview of activities report under the Activities tab.
Then click Columns in the right sidebar and create a simple contingency table where you can drag and drop items into the Row groups:
- Client
- Project
- Activity Name
and you may drag an item into the Values:
- Duration
This will allow you to group all activities recorded for individual clients and projects into logical units. At the same time, you can also easily see how much work all your team members have done on a particular project or client.
-
Calendar of absences and activities
In the Calendars section of the right-side menu, among other types, you can also find two calendars named Absences and Time Tracking and Activities. These calendars provide a comprehensive overview of absences and activities across the company, specific teams, or selected users. Let's take a closer look at how they work!
Calendar of absences
The Absence Calendar gives you a complete overview of user absences as well as bank holidays. By default, it displays the bank holidays of your company’s country. However, when viewing absences for employees based in other countries, their respective national holidays will be shown accordingly.
At the top of the calendar, you’ll find a range of filters that allow you to narrow the view by:
-
Specific time frames
-
Types of absence
-
Selected users
Managing Absences as an Administrator
Administrators have the ability to add or delete absence events for any user in the company directly from the calendar.
Deleting an Absence
To delete an absence event:
-
Click on the event you wish to delete.
-
A preview window will open.
-
Click the Delete option that appears.
You can also leave a comment—for example, to explain to the user why the absence was cancelled. It's possible to tag the user in the comment section so they receive a notification.
Adding an Absence
Administrators can also add absence events directly to the calendar. This function is available for active users only and can be applied to any time period, including past dates. This is especially useful when starting to use Sloneek mid-year and needing to log past absences that have already been taken.
To create a new absence:
-
Click the New Absence button in the top-right corner.
-
A form will appear where you can specify:
-
User name
-
Type of absence
-
Start and end date
-
Once submitted, the absence will be recorded directly in the calendar.
Calendar Time tracking and activities
The Activities Calendar provides a comprehensive overview of all users' activities. Similar to the Absences Calendar, it allows you to filter activities by a specific timeframe, selected activity types, or users.
Administrators can also create an activity entry for any user by clicking the New Activity button in the upper-right corner. A new window will open, enabling the admin to input all relevant activity details, including whether the activity is associated with a specific client or project.
Activities can be added retrospectively or scheduled in advance, making this feature particularly useful for planning and assigning shifts.
-
-
How to use activities time tracking?
You can use the module to record various activities in 3 different ways:
 Plan AHEAD
Plan the events you plan to do.
- schedule shifts (to someone)
- reporting the fact that I want to work (me)
- team agrees and announces who will be on duty, on-call, etc.
 Report BACK
Revise scheduled time according to actual time worked on a specific activity
- record time worked in slow mode (no minute accuracy is assumed either)
- attendance records
- comparison of time worked with absences or time pool
 Measure accurately and up-to-date (RIGHT NOW) using time tracking
Measure time spent working at the exact moment the work is in progress
- the freelancer logs the time to be invoiced to his/her main customer
- an internal employee or even a freelancer (lawyer, accountant, creative) logs the time he or his company will invoice the client
You can use activities to keep track of homeoffice work (detailed in the article here) and record time spent on business trips (detailed in the article here).
Just beware that timetracking cannot be enabled by default for Homeoffice and Service Path activities. This mode is deliberately disabled to allow timetracking of other activities on Homeoffice.
-
Time tracking settings
Module for creating time sheets, business trips and home office.Dialer settings
In Settings / Activity Events, set the types of activities that should be available for your company.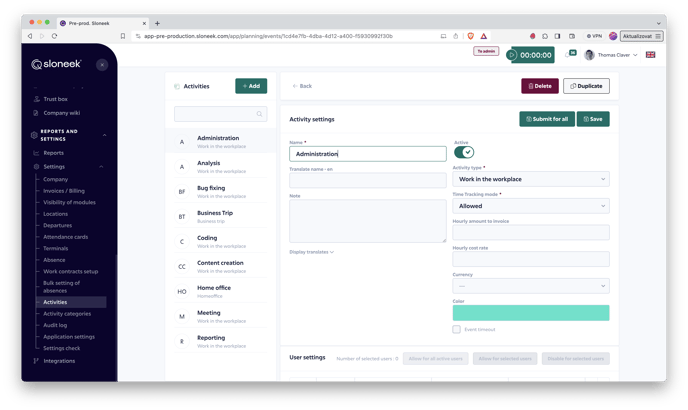 Explanation of each item:
- Name: This is how the events will be displayed when selected by the user. If you fill in the translations in the right column, they will be displayed in relation to the selected language of the application
- Type: Select whether the work is on-site, off-site or the activity is of type Business Trip or Homeoffice (more about these two specific types of activities HERE). This item can be edited even if the item is active and users are already drawing on it!
-
Time tracking mode: How will the activity be accessed to track time worked using Time Tracking?
- Not allowed = Time Tracking cannot be used, the activity will only need to be logged via the activity calendar
- Enabled = it will be possible to use both Time Tracking and logging via the activity calendar.
- Required = it will only be possible to log the activity using Time Tracking, i.e. not via the activity calendar.
- Hourly and cost amount to be invoiced: by filling in, you will differentiate between costs and supporting documents to be invoiced at company level. You can fill in the amounts individually (e.g. for different roles) (see below)
- Currency: specifies the uniform reporting currency for the accountant
Event categorization
Each activity event can have its own categories. These will make your reports more detailed, better and more evaluable. You can have any number of categories. You can set them up in Settings / Activity Categories.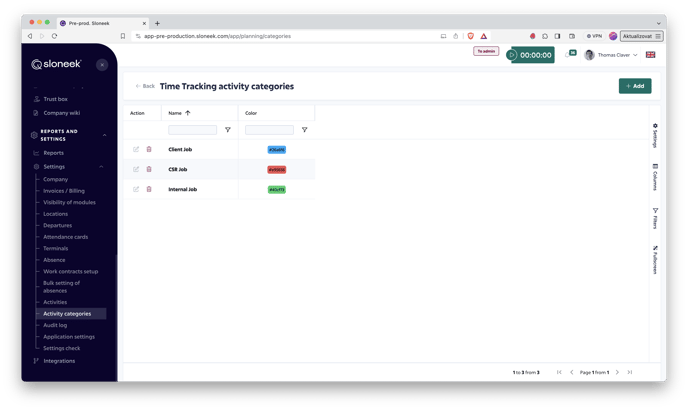
Assigning an activity to a user
You can assign activity events to each user in the User tab, under the Activity Overview tab, by clicking on/show%20activity%20settings.png?width=120&name=show%20activity%20settings.png) .
.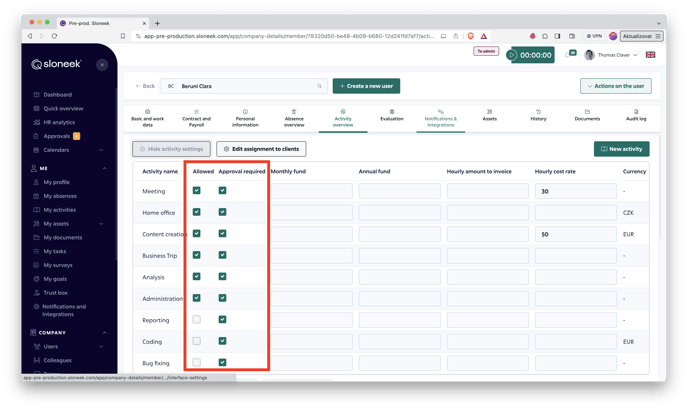 For each user, you can set not only whether or not he can draw an event, or if a supervisor's approval is required when drawing an event or not. By filling in a monthly or annual pool, you set limits for drawdowns within a specified time period.By modifying the For invoicing and Costs items, you change the company settings (that you made at the company level) to individual.
 You can track activities directly to specific client projects. To set up Clients and Projects, check out the article here.
-
Setting the editing of activity entered using time tracking
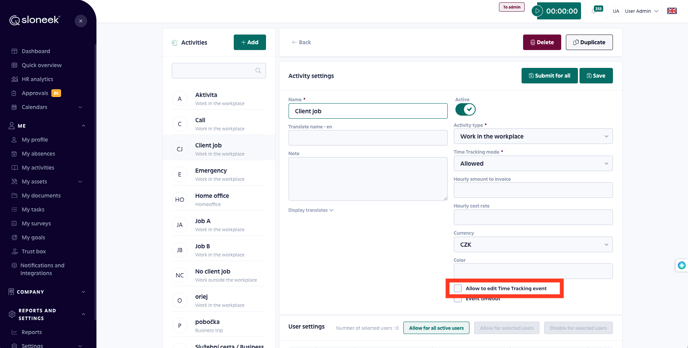
By the nature of the time tracking functionality, the option to allow editing of these events is not automatically enabled. If you want to use this feature, you need to set it up.Settings can be made by a user with the Administrator or Account Owner role In the Reports and Settings/Activities section. In the activity detail, where you want to enable/disable the option to edit time tracking events, check this option. Don't forget to save the settings!
