New hire packet
-
Sending a new hire packet, monitoring the progress of fulfillment
Control the entry of new colleagues to the company, increase employee satisfaction and experience!Sending a new hire packet
Sending the new hire packet is only possible to users who have never been active in your account in the application.
Therefore, inactive users who have historically been active will not appear in the selection of users to send the package to.
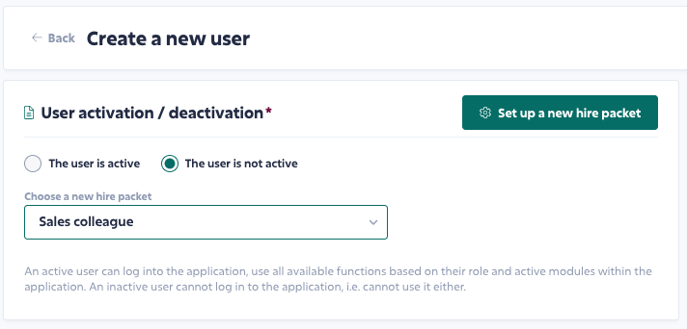
You can assign and send the package in 2 possible ways. When creating a new user directly from the user folder (Users / Management) or from the section Users / New hire packets. In the second case you must already have created a user!
 Creating a user directly from the User Folder
You create users in Users / Management by clicking the Add button. You fill in your first name, last name and email address to which you will send the new hire packet (probably a private email). You leave the user INACTIVE.
You will be presented with the option to select the template you want to use.
Click Create user in the upper right corner.
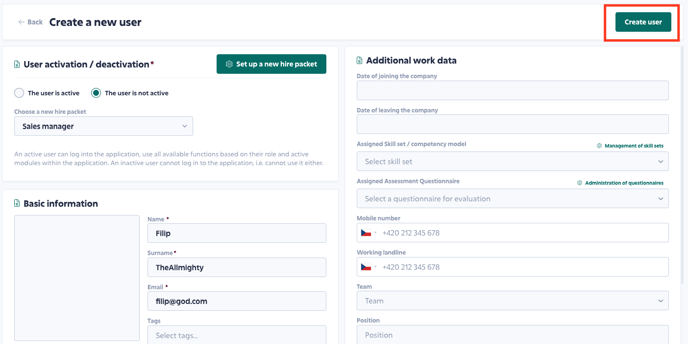
Now you just check and fill in the missing information and submit.
! Attention!
The user language is set to EN (English) by default. To change the language in which the application will communicate with the user (and this is not only about the application environment, but also about notifications), set the desired language in the User folder / Notifications and integration tab.
 Sending the packet from the New hire packets section
! Attention !
In order to be able to assign a packet, a user must already be created!
Go to the list of templates in Users / New hire packets. Click on the three dots
/button_Akce.png?width=28&height=30&name=button_Akce.png) next to the template you want to work with. The second alternative is to directly click on Assign a package to a new colleague
next to the template you want to work with. The second alternative is to directly click on Assign a package to a new colleague  .
. The process is then the same as in the case of assigning and sending a package from the user's folder.
Monitoring the progress
You can follow the process of filling out templates by clicking on a small arrow
/performance_detail-1.png?width=41&height=17&name=performance_detail-1.png) in the template row. A list of all sent packages and their filling status will be expanded.
in the template row. A list of all sent packages and their filling status will be expanded.By clicking on three dots
/button_Akce.png?width=38&height=41&name=button_Akce.png) in the line of a specific new colleague, you will get to the menu. In addition to Editing and Deleting, you can resend the package if needed. By selecting Preview, you can see in detail how the newcomer continues to fill out the sent package.
in the line of a specific new colleague, you will get to the menu. In addition to Editing and Deleting, you can resend the package if needed. By selecting Preview, you can see in detail how the newcomer continues to fill out the sent package.
-
Setting up and editing new hire packets
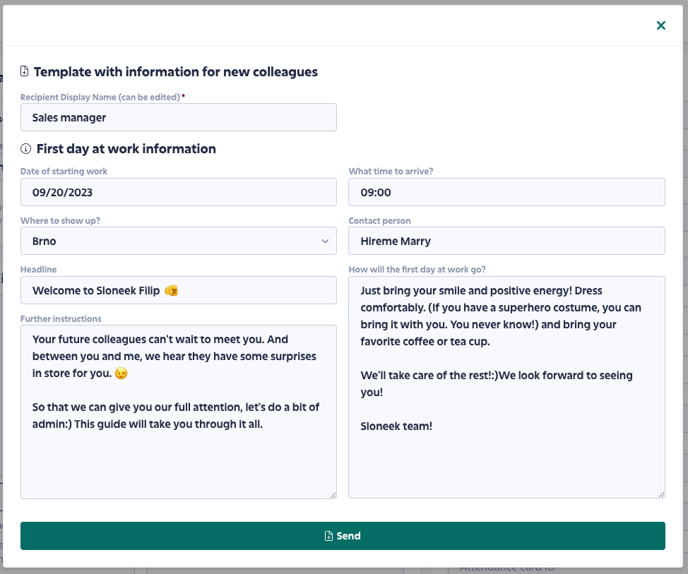
Save time by preparing the arrival of new colleagues!First, let's take a look at what a new colleague actually sees when the pre-hire packet arrives in their email:
You work with the preparation of information for newcomers in the section Users / New hire packets. Similar to Onboarding, you work with templates for the new hire packet.
The template is divided into 4 parts:
- Information on the day of arrival
- Personal data to be filled
- Custom fields to fill
- Introducing the team's rookie
- Required documents
- Consent to GDPR
Consent to the GDPR is also a mandatory part, because at the time of filling in the information, you probably will not have signed a contract with the new colleague, or consent to the processing of personal data.We have some tips for filling it out below:
It is not necessary to fill in information about the date or place of entry or a contact person in the template (unless you have a fixed one for welcoming newcomers).
On the contrary, you can do more work with the texts How the first day at work will go and Further instructions. The probability that this information will remain the same is quite high.
If you would like to alternate the texts by department, for example, prepare several templates. It will speed up the preparation and clearance of new colleagues tremendously!
If you are an international company, then you will probably need to prepare templates in different language versions.
In the custom fields selection, all custom text, number, and date fields that you have active will be displayed.
Let the newcomer fill in the questions, which can serve well as a quick introduction and "communication guide". Here, too, there are no limits to creativity. Other colleagues will then see the answers to these questions in the New Colleagues section of the main desktop app.
Under Required Documents, you can specify what you want the newcomer to send you before joining, e.g. photo, medical certificate, etc.
Finally, don't forget to save the template!
Now have a look at the article on how to send a template to new colleagues.